Airfield Models - How To

Make a Router/Shaper Table using a Dremel Moto Tool

December 19, 2021


Home
About
What's New
History
Models Gallery
Model Building Safety
Articles
Mail & FAQ
Site Map
Site Feedback
Contact
Add to Favorites
Comments
Search Airfield Models

Back to How-To Articles


Airfield Models (http://www.airfieldmodels.com)Make a Router/Shaper Table for use with a Moto Tool

This is not the router table that I recommend you make.  I have kept this article posted because it contains good information about using the table that I refer to in the article about making a better router table.

A router/shaper table is a really great tool for accomplishing a lot of tasks faster 
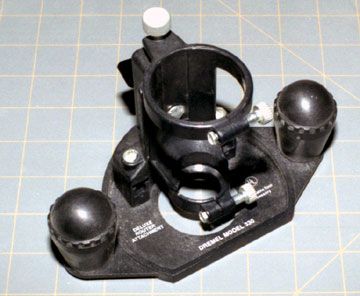
and more accurately than by other means.  I looked at the Dremel router/shaper table on display in a store.  The table was obviously warpedprobably from when it cooled after being pulled from the mold.

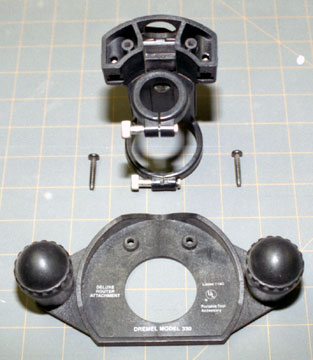
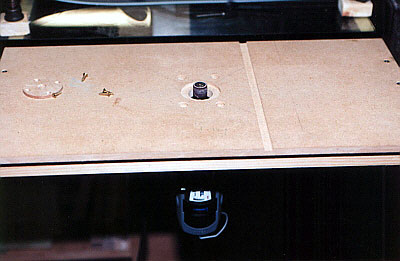
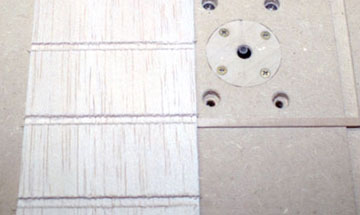
I decided it would be better to make my own to include quality that is lacking from the Dremel.  It is important the table is flat and not flexible.

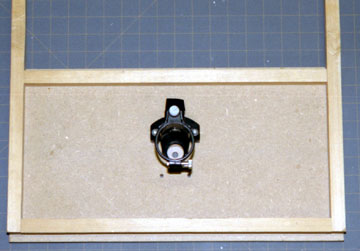
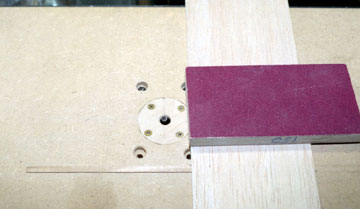
I use my router table for a variety of tasks.  Often I use it to relieve an area so that I can add a reinforcing piece.  I also use it to shape edges and as a stationary sander.  The table is easy to make and very inexpensive assuming you already have a moto tool.

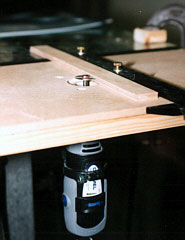
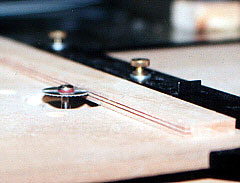
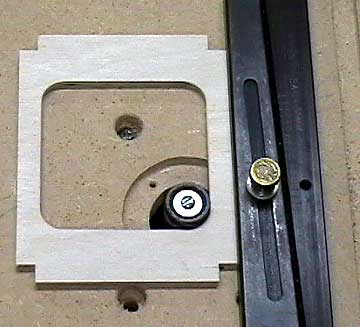
You will need some type of fence and possibly a miter gauge.  I originally used the fence from my table saw which is dangerous.  When I first built my router table I didn't know anything about router tables.  I've used the table quite a bit since I built it and have learned a lot.

A straight fence is the most useful but a split fence allows the table to be used as a jointer.  Any fence you use must have an opening that will pass any bits you plan to use.  In general the center of the bit must be behind the face of the fence.  Using a fence for a table saw puts the bit in front of the fence which is wrong.

Also see


Making the Router/Shaper Table

Because Dremel likes to change the specifications of their tools with the cycles of the moon and the fact that their tools are consumer-market quality, you will probably end up making more than one table in your lifetime.

The router accessory you buy now won't fit the tool you buy to replace your current one which means you'll need a new router accessory.  You can bet money that it also won't fit the table you make.

Router Accessory for Dremel Moto Tools This is the router accessory that fits my current Dremel tool.  It's cheaply made, flimsy and annoyingly flexible (spongy), but can be made to work when tolerances can be loose.
Bottom of the Dremel Router Accessory The base plate of the router accessory is held to the moto-tool clamp assembly by two screws.

The base isn't used with the table, but don't get rid of it because there will be times when you want to use the router accessory without the table and you'll need to put it back together as it was originally.

The Dremel Router Accessory Disassembled Use the screws that hold the base to the clamp assembly to secure the clamp assembly to the underside of the table.  Be careful not to cross-thread the screws.

Use the base to locate the holes and the center that needs to be cut out.

For best support of small pieces that we work with, make the cut-out as small as possible.  If you have a bit that is too large to go through the cut-out then you can do one of two things.

Either make the hole larger when necessary or do what I do and insert the bit through the top of the table.  It's awkward tightening the bit once the moto tool is mounted in the table, but can be done.

Be sure the tool is unplugged.

Only two of the four holes for mounting the router accessory are needed.

I drilled the first set on the wrong side of the board which placed the switch to the Dremel where I would have to reach around to get to it.

Dremel Router Accessory Bolted to Underside of Router/Shaper Table The bottom of the table is framed with good quality , straight-grained pine.  I used 3/4" square stock.  The table top is 1/2" MDF which I bought when I was stationed in Germany.  I had trouble finding this thickness locally.  I found a place that carries it nearly one hundred miles from my home and was prepared to drive there when by chance I found some in Home Depot.

It wasn't with their other sheet stock.  It was cut into 2' x 4' pieces and called hobby board or craft board or something like that.  They also had 1/4" MDF which I didn't buy but I can see that it might be useful for something eventually.

The nice thing about the 1/2" MDF is that it is the same thickness as my glass workbench top.  The router table top should be flush with or higher than the bench top that it clamps to so that work can slide without hitting the bench top.

Alternatively, you could build a cabinet for the table and make it a free standing unit.  I didn't think it would be heavy or stable enough so I elected to use a clamp system.


Using the Router/Shaper Table

Now that you've made it, what's it good for?

An inset allows a small hole for small bits and small work.  Removing it allows larger bits to be used.

I made a plywood insert for my table.  A Forstner bit will make it easy to relieve the table, but I don't have a drill press that can handle a bit this size, so I used a router to relieve the area.

With the insert removed, I can use larger bits.  Having a stationary drum sander is nice for those times when you need to sand concave work.

Very precise work can be done on a router table that would be difficult to do any other way.

Here you can see the Dremel clamped into the router accessory.

Always think about safety.  Moto tools can be very dangerous!

A very dangerous use for your Dremel.  These saws can slice through your body so quickly you will not even know what happened, so be extremely careful when using them.

If you are using your Dremel free-hand, be sure your work is solidly held by some type of device and use both hands to hold your Dremel for additional stability and safety.

Always cut former outlines slightly over-size and sand to final shape.  Internal cut-outs lighten the formers as well as making it easier to move things around inside. I leave the clamping screw on this table saw fence loose so I can adjust it as I slide the former along.

I probably use the table as a sander more than anything else.

This is absolutely the wrong type of fence to use with a router table.

Making Lattice Work Here I am making lattice wing skins for Thwing!.  First I'm routing the half-lap joints through the sheet of balsa.  Note that I'm using a sanding block to feed the work through the router.

At the lower part of the photo you can see a strip of wood that is temporarily glued to the table top.  This is used as an indexing guide to ensure the slots are parallel and evenly spaced.  It worked better than I expected.

After all the slots are routed the sheet will be stripped into sticks that will be joined.

Making Lattice Work I tried several different bits to accomplish this task.  The worst of the lot was the actual router bit.  I ended up using a high-speed steel cutter, but it still left a shredded edge.

This is one thing that I don't blame Dremel for.  It is difficult to route soft woods cleanly and requires extremely sharp cutters.

A lot of sanding across the sheet removed most of the fuzz that didn't cut away cleanly.

Lattice-Work When it was all said and done, the lattice-work came out fine, but there was a lot of clean-up work necessary.

Also see


Previous —
Next —

Make Perfectly Straight Cuts Using a Scroll Saw
How To Make a Router/Shaper Table for use with Dremel Moto Tools

Comments about this article


Back to How-To's
Airfield Models Home


Copyright © 2002-2004 Paul K. Johnson