Making the Router/Shaper Table
The lowest quality component of this table is the actual router base made by
Dremel. Dremel makes poor
quality, consumer-market tools and the accessories they make are even worse. It appears they have no intention of
making higher quality tools as they're obsessed with making flashy-looking, moto-tools with sexy curves and stupid
rip-off names (isn't XP used for some product already?). These tools look a lot better than they actually work if
you don't have an eye for what cheap plastic junk looks like. If you do have an eye for it then they don't look
all that great either.
I have looked at other brands of moto-tools and they don't look much better. Until a
manufacturer makes high quality moto tools and accessories we're pretty much stuck with
what's available now.
I think a small laminate router/trimmer would also work well but I've never owned or used one. There's a lot more
competition among real router manufacturers so it may be worth looking into them. This table would be the right
size for mounting it. The only question is if the bits appropriate for model work.
My table is 20" x 14" x 1/2" Medium Density Fiberboard (MDF). If you're a miniature builder then this table
will be very useful for you as you can machine miniature moldings and put decorative edges on furniture and other small
items. For us model aircraft builders the table can be used to round over edges, cut grooves in sticks to route
antennas, a stationary drum sander and a myriad of other things.
If you make a split fence the table can be used as a jointer.
If you're a machinist or know one you can make your own custom router bits by re-grinding commercially available bits
having a 1/8" shank.
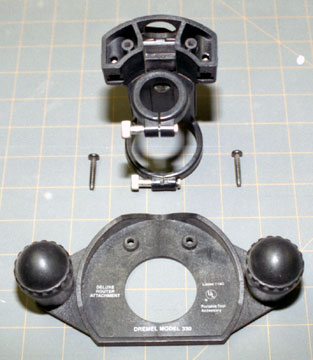 |
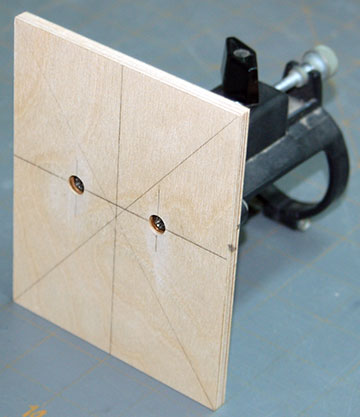
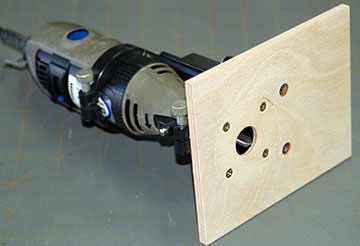
The Dremel router base. The base is removed and stored. The clamping assembly is used to
attach the Dremel tool to the underside of the table. Use the screws that mount the base to the clamping
assembly to mount the clamping assembly to the table. Be careful when threading them in so that you don't
cross-thread them or strip the plastic. Tip! The best way to avoid
cross-threading is to turn the screw backward until you feel a click. Then thread it in gently for the first
couple turns. If it doesn't thread in easily then it's probably cross-threading. |
 |
I am still holding out hope that one day there will be a very high quality moto tool and related
accessories. There's also the fact that Dremel changes the specifications of their tools with every new model
and I know my current Dremel won't last forever. When I buy a new tool I'll also need to buy a new router
accessory which I'd bet money won't attach the same way as my current model. For those
reasons I decided to make an insert for the table that can be replaced with a new one which will mount my fantasy
moto-tool that doesn't exist yet. I
laminated two pieces of 1/8"
aircraft plywood to
make a 1/4" insert.
The first thing I did was determine where the router accessory should mount. I set it up so that the
accessory and tool will drop through the hole in the table without having to do too much maneuvering. This put
the center of the collet well off-center in the insert.
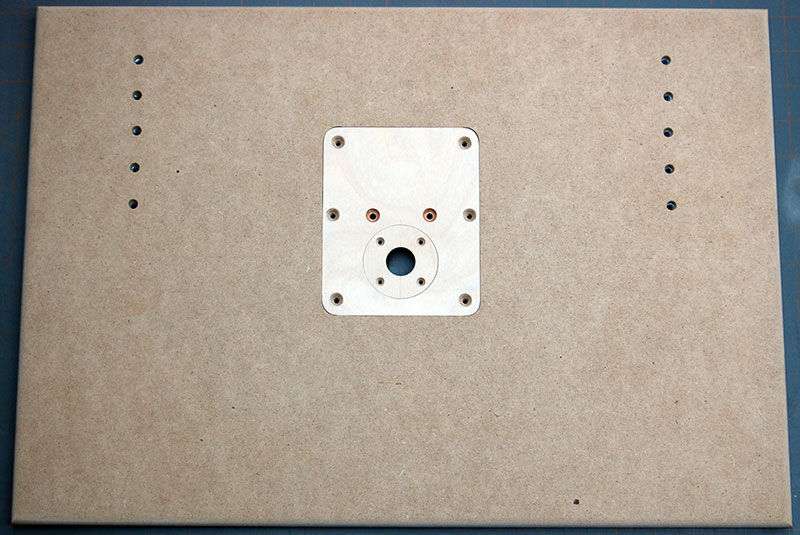
When the location was calculated I went ahead and mounted the router accessory. I used the base that is
removed and not otherwise used to locate the mounting holes. |
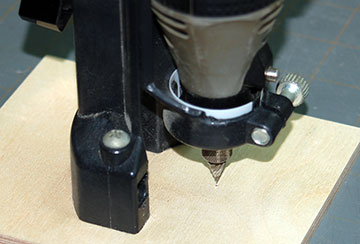 |
Next I inserted a pointy bit and raised the router until the bit just cleared the insert. I
tightened the router so that it was just loose enough that the up-down adjustment knob could raise and lower the
moto tool but not so loose that the router could wiggle around. I then raised the moto tool with it running
until the bit just barely spotted the insert. That gave me the location of the exact center of the collet.
Remove the router attachment.
Now use the smallest drill bit you have in a drill press to drill all the way through the insert. I used a
1/32" bit. This will be the pilot hole to guide whatever bits you use to open the hole to pass router
bits. |
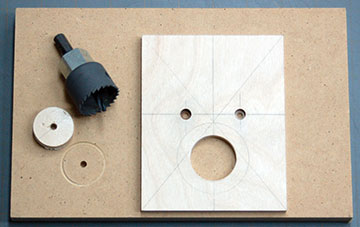 |
You will mount a second round insert in this insert. I made the round insert from 1/8" aircraft
plywood. Before making any further cuts I drew a circle the size of the inset with a drafting compass.
The point of the compass was placed in the pilot hole. If you have a drill press and a 2" Forstner bit then drill to a depth that is the
exact thickness of your round insert. You should probably make the insert first because plywood is never
the exact thickness it is claimed to be.
After you have finished with the forstner bit drill a 1" clearance hole. This will create a lip for
the round insert to mount. See the next photo.
If you don't have a drill press and forstner bit then the harder way to achieve the same thing is to first cut a
clearance hole using a 1" hole saw. |
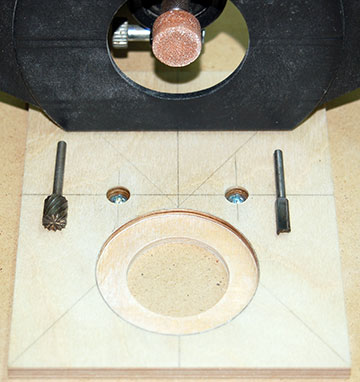 |
Now use a router to create the lip. I tried both bits shown on the insert but they did a poor job. The garnite bit gave me much better results. |
 |
Now fit and mount the round insert. If you cut too deeply you can always shim the insert
back up using whatever thickness material gets the job done. Copy paper and cardstock both work well.
I had shim both the large insert the Dremel is mounted to and the circular inset because I cut too deep for both.
If you leave the round insert slighly proud you can sand it flush with the larger inset. If you do that then
be sure the screws are fully tightened before you sand. |
 |
The bit should be very well centered if you spotted the center as I indicated above and if your round
insert is actually round. I made the insert by drilling a 1/16" hole in the center of the blank. I
also drilled a 1/16" hole in a piece of 1/4" scrap plywood. A 1/16" music wire pin was inserted in the plywood
scrap and then the blank was placed over the pin. The whole works was
clamped to the table of my
disk sander
and adjusted until the insert was round and the correct diameter.
The insert is mounted with four #4 x 1/2" brass wood screws. |
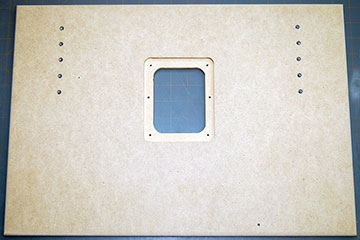 |
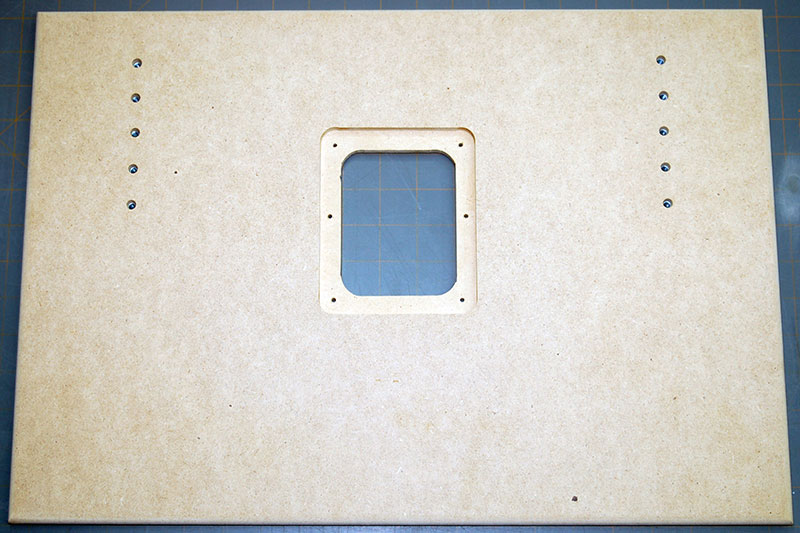
The table is cut from 1/2" Medium Density Fiberboard (MDF). I routed the area for the insert
and drilled holes for the split fence. All edges were rounded over using my full size router and a 3/8"
round-over bit. I like MDF because it is stable, acceptably flat, doesn't have a natural tendency to warp
because it has no grain and it has a nice surface. I don't suggest using construction grade plywood because
there's nothing right about it. It's warped when you buy it. It splinters, usually has defects filled
with "footballs", and is difficult to finish to a smooth surface.
I think aluminum plate would be the best choice if you have a way to cut it accurately. I don't have the
right tools to work with large pieces of metal so it would have taken me a lot more effort to achieve a square
table. I'm not sure what thickness would work best but I'm thinking at least 3/16" and probably 1/4". |
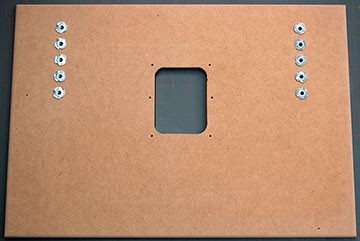 |
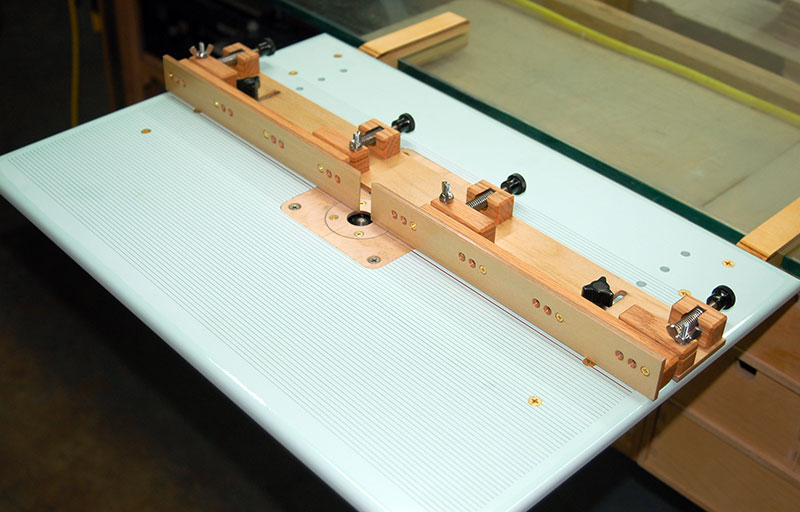
Blind nuts are embedded in the underside of the table. The fence is coarse adjusted by
removing two knobs. |
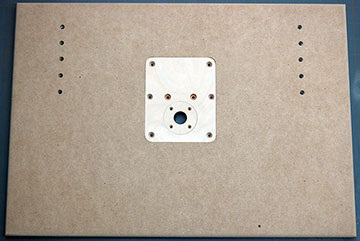 |
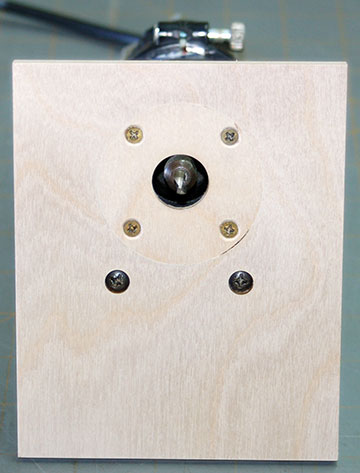
I had the choice of either chiseling out the corners of the table or rounding the corners of the
insert. I chose the easier route. The insert is mounted using six #6 x 1/2" wood screws.
Note that the insert is mounted such that the controls of the Dremel tool can be accessed from the front of the
table. |
 |
How you mount your table is up to you. I wanted something compact and sturdy with a minimum of
setup time. I don't use my router table enough to leave it set up all the time so I didn't want a
cabinet-mounted space-hog or something with folding legs that I had to fiddle around with. My first table
had extensions that clamped under the top of my
workbench. It was a real pain in use because I had to support
the table using one arm and my belly while trying to attach a C-clamp with one hand. I didn't want to live the
sequel so I thought of something better.
My workbench is already a little higher than I want it so I also didn't want to use extensions under the table
that mount above the bench. I split the difference and cut slots in the extensions that slide over my
workbench top which is 1/2" tempered glass. |
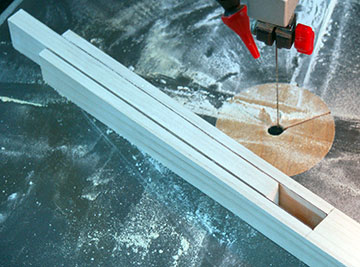 |
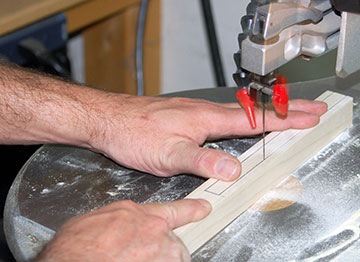
By the time they were finished the extensions were shortened considerably from what is shown here.
A band saw would be the best tool to cut these but my
scroll saw worked fine. It just
took longer. |
In this series
Also see
|