Airfield Models - Model Building Tools

Microlux Tilting Arbor Table Saw

December 19, 2021


Home
About
What's New
History
Models Gallery
Model Building Safety
Articles
Mail & FAQ
Site Map
Site Feedback
Contact
Add to Favorites
Comments
Search Airfield Models

Back to Model Building Tools


Airfield Models (http://www.airfieldmodels.com)Microlux Tilting Arbor Table Saw

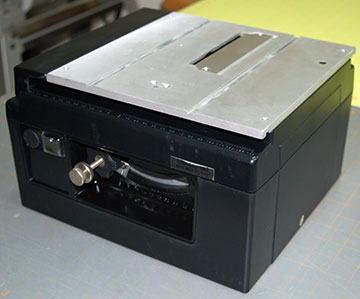
To the best of my recollection, I purchased my Microlux table saw in 2001.  It entered a coma in August 2007.  My saw has seen very heavy duty use for a saw this size and being my first table saw I abused it a lot just because I didn't know how to treat it right.  It's been a very dependable unit in spite of being mistreated.

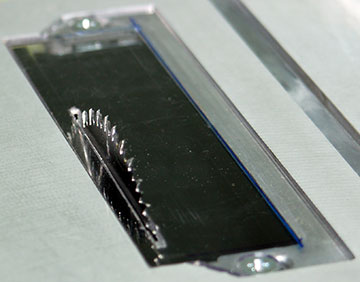
I had just finished making the last cuts on sixteen sets of magnetic fixtures (480 pieces having multiple cuts).  The next time I turned the saw on it ran at an extremely low RPM and the speed control didn't work.

Because the saw was so old and the fact that sending things in to be repaired costs almost as much as a new tool but 
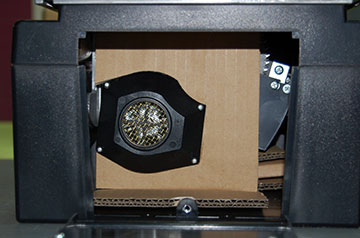
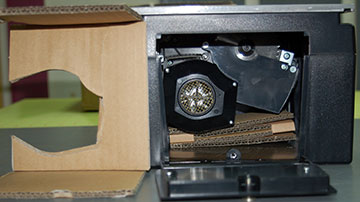
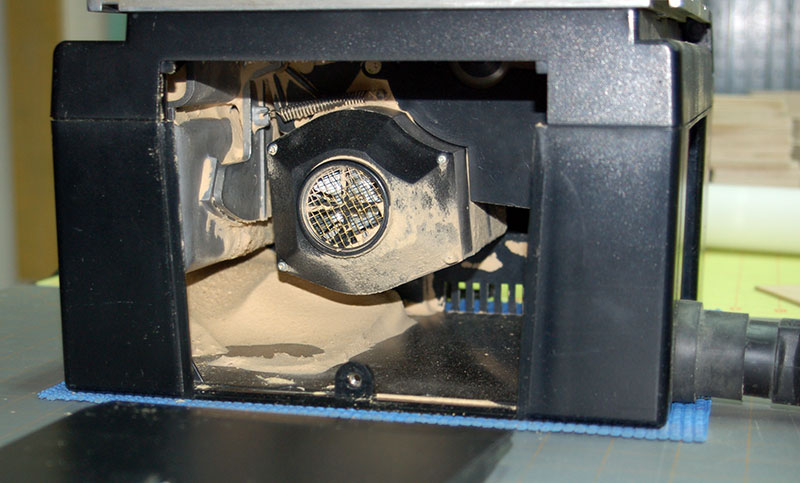
yields an old, repaired tool, I decided to dive into the machine and see if I could fix it.  I wish I'd taken photos along the way so I could show you what's inside, but I didn't.  Suffice to say you don't want to take this saw apart unless you have to.

I couldn't find anything wrong.  My first thought was that it was the rheostat speed control.  My electronics guru buddy came by and declared the rheostat to be sound.  In other words, the simplest and least expensive thing to fix wasn't the problem.

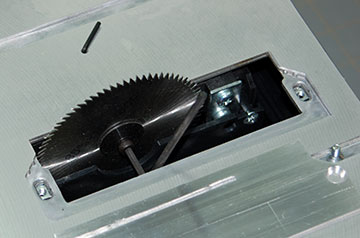
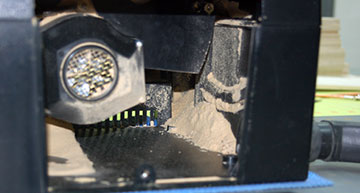
That left the problem to be either the circuit board or the motor.  So I tore the saw down completely including pulling the core from the motor to check the brushes.  The circuit board didn't look fried but that never means anything.  If it does look fried then it's probably the problem but if it doesn't look fried it might still be the problem.

So I called MicroMark tech service and spoke to Vince for quite a while.  Before I made the call I put the guts of the saw back together enough that I could at least turn it on.  He listened to the motor over the phone and said he thinks it's the board but couldn't be sure.

In the mean time the saw was on sale and was supposed to go up in price when the sale was over.  I had about four days to decide if I was going to buy another saw if I wanted the sale price.  Vince assured me that if the part didn't work he would take the part back and refund my money.  Additionally, he said he would extend the sale price to me if the sale ended and the part didn't work.

A few days later I received the new board.  It was shipped 2nd day air so the $35.00 board plus shipping plus some miscellaneous screws he gave me for free came to a grand total of $50.00.  The motor was $90.00 as of this writing so I'm glad it wasn't the problem.

Several wires need to be de-soldered from the board to remove it.  I decided to put the parts together outside the saw to see if they worked rather than put the whole thing back together and possibly have to disassemble it all again if the board didn't work.  Thankfully the new board worked and now I had to reassemble everything.  That took about three hours and wasn't real difficult but there are assemblies like Chinese puzzles in there where you have to slide this through that before you can attach any of it.

In the mean time I decided that since this saw has become a centerpiece of my shop activities it wouldn't hurt to have another one so I went ahead and purchased a new unit.  My old saw is running fine but it doesn't have that happy sound it should have.  Something inside needs to be tweaked but I have no idea what it is.

I'll be using my new saw and keeping the old one as a spare.  It's now completely cleaned and in the box the new saw came in safely stored away for when it's time comes again.

To the best of my knowledge this saw is exactly the same as the Proxxon FKS/E Deluxe Small Scale Table Saw.  In fact, I'm pretty sure that most Microlux tools are simply re-branding of other tools.

Also see


Addendum 6-19-2009

I need to apologize for this review.  I gave the Microlux table saw a glowing review that was simply wrong.  I have an excuse which I'm going to inflict on you but I'm sure I led more than one person astray and I really am sorry about that.

My excuse is that my old saw (the same model number as my new saw) didn't have the problems my new saw has.  When I wrote this review I had a lot of experience with the old saw but very little with the new one.

I continued using my old saw after the repair and it lasted another year or so before something inside blew up.  At that time I boxed up the old saw and started using the new one.

The problem with my new saw is that the miter slots don't align with the blade.  This has caused countless problems from burned wood to throwing wood across my shop.  Additionally, there are saw marks all over the edge of the cut which means a lot of sanding to remove them.

There is no built-in method to correct the problem.  The saw motor can't be repositioned to align with the slots.

In fact, the saw fence that comes with the saw isn't adjustable either so using it causes the same problems as using anything that rides in the miter slots including my sled.

I have the Accurizer II fence which is adjustable so at least the saw can be used with that fence.

I have not contacted MicroMark about the situation because I've had the saw so long I really don't expect them to do anything about it.  At the same time I have to withdraw my recommendation for this saw.

The rest of the review is as I originally wrote it and again, it was based on my first saw which didn't have the alignment problem.  I don't know how prevalent misaligned saws are but it's probably a crap shoot.  You might get lucky like I did the first time and get a saw that's fine or you might get a saw like my second which is functionally useless.


Specifications

These specs are from the MicroMark catalog as I have no way to measure them:

1/2 HP, variable speed motor turning 3,600 to 7,000 RPM.

Price as of date article was initially posted: $350.00

These specs are from my measurements and vary slightly from the MicroMark catalog:

Overall height to top of table:

6-1/4"

Overall depth:

10-3/8"

Overall width with extension arm retracted:

11-3/4"

Total width of table top with extension arm retracted:

11-1/2"

Aluminum table:

9-5/8" W x 9-1/2" D

Overall width of table top with arm extended:

19-1/2"

Motor:

100v DC

Stock and carbide blade diameter:

3-1/4"

Weight:

11 lbs

Tilt:

90° to 45°

Maximum depth of cut at 90°
(depending on blade and material):

1"

Maximum depth of cut at 45°
(depending on blade and material):

0.7"


Microlux Tilt Arbor Table Saw box.

Your Microlux Tilting-Arbor Table Saw should arrive inside a larger shipping box.  The box the saw is packed in won't afford much protection to the saw on its own.  There is a label on the top of the box.  Read and heed.

Notice to remove inner packing before raising or tilting blade.

They aren't kidding about this.  There is a lot of cardboard inside the saw to keep the inner works from beating itself to death during shipment.

Microlux Tilt Arbor Table Saw.

The saw brand new out of the box.

The cast aluminum saw table is milled but not even slightly polished.  I'd love to own a machine that could flatten and put a high polish on all my power tool tables.  A smooth surface makes a big difference in how easily work slides on the table.

Microlux Tilt Arbor Table Saw has all controls up front.

All the controls are up-front and easily accessed.

The left-most knob is the speed control.  To the right of that is the power switch.

The steel knob to the left of center raises and lowers the blade.

The black star-shaped knob allows the saw blade to tilt from 90° to 45°.

On the left of the aluminum table is an extension arm that extends several inches.  It helps support longer stock such as when cross-cutting long sheets.  There is a leg under the arm that swings down to support the arm.

Additional items that come with the saw. This is everything else included with the saw.  The instructions are pretty good but not great.  The saw does come with an exploded parts diagram which was very helpful when I took mine apart.  There are instructions for replacing the belt if you ever need to but there are no illustrations showing you how.  My first saw still has the original belt and it's seen heavy use for nearly seven years.

The belt looked to be in excellent condition so I put it back on even though I had a replacement belt on hand.

The fence doesn't work very well.  There are two knobs to tighten the fence — one in front and one in the rear.  Both my stock fences lift from the table when the rear knob is tightened.

My attorney advises me to advise you to attach the blade guard even though I don't use it.

The miter gauge can be used but you'll be a lot happier with a sled.  You can make your own like I did or buy the pre-fab unit from MicroMark.  For the price it's easier to buy as long as they made it right.  I haven't seen theirs in person so I have nothing more to say about it.

A rubber adapter for a 1-1/4" vacuum hose is included.

The bag contains bolts for mounting the saw and two Allen keys used to change the blade.

The inner packing that must be removed before using the saw. Remove the door on the right side of the saw to remove the cardboard.  This piece must be removed first.  There is a 90° bend at both the top and bottom of the first cardboard piece you see.  If you're having trouble getting this piece out it's probably because you haven't pulled down the part toward the top of the saw.

The removable door has a built-in storage area for your Allen keys and extra blades.

Even more packing inside. When the first piece is removed there are more pieces under the saw motor.  I had to raise the blade slightly before I could get them out.
The stock fence (top) with the accessory Accurizer II fence. I use the Accurizer II fence sold by MicroMark.  It's an excellent fence that allows great precision.  It's also expensive.  As of this writing the Accurizer fence is $60.00.
Various blade plates. The stock aluminum blade plate is on the left.  The second and third plates are plastic (acrylic or lexan) optional accessories that replace the stock plate.  The third plate still has the protective liner attached.  The idea is to have a zero-clearance plate that prevents small pieces from falling into the saw and getting kicked back in your face or jamming the saw or just getting lost.

The plastic plate can't support any type of load — it bows in while you're pushing the work through the saw.  I'm sorry I bought them.

I had a piece of aluminum the correct thickness and made my own zero-clearance blade plate.  It works great.

Stock blade and blade plate. The stock plate lets small pieces fall into the saw.  I only use the stock plate when the saw is tilted because my zero-clearance plate only works at 90°.
Stock blade with optional accessory plastic blade plate. The stock blade with the plastic zero-clearance plate.
Optional carbide-tipped blade with home-made aluminum zero-clearance blade plate. My home-made aluminum zero clearance plate with the carbide-tipped blade.
Changing saw blades. The blade must be raised to its maximum height to change it.  Be sure the saw is unplugged.

Put the small Allen key in the hole to the left of the blade.  Rotate the blade until the key falls all the way to the table.

The larger key loosens the bolt that attaches the blade.

Various blades and blade washers. A variety of blades are available for the saw.  The stock blade is horrible.  OK, it's not that bad but it's not great either.  I don't use it but it would be a good idea for me to use it for rough cuts to save wear on my more expensive carbide tipped blade.  Changing blades is tedious so I just leave the carbide blade in for most work.

The thinner blades are very light-duty.  You can cross-cut thin balsa up to about 1/8" and you can use it to cut small aluminum or brass round or square tubing.  They're great for cross-cutting thin stock such as shear webs.

The carbide blade is $38.00 as of this writing.

Blade washers. The stock blade and the carbide tipped blade both use the blade washer that comes with the saw.  The thin slitting blades have a larger arbor hole so you'll need the accessory blade washer which has a machined lip that matches the diameter of the hole in the blade.
1-1/4" vacuum attachment. There is a small plate in the vacuum attachment which leaves a very small hole.  I only noticed this recently and plan to remove the plate to see what the difference is in regard to removing dust from the saw.
1-1/4" rubber vacuum adapter. A rubber adapter piece is used to attach a standard 1-1/4" vacuum hose.
A lot of dust stays inside the saw even when using a vacuum. The saw was completely cleaned and then lots of wood was cut.  The vacuum was running any time the saw was on.  All this dust was left behind.  Yes, the door was in place when the saw was in use.

In this and the next photo you can pretty much figure out why there's so much sawdust still in the saw.  There are only two airways the vacuum can create: through the top of the saw (blade plate) and through the vent on the lower left side of the saw.

You can see there is a dust-free path from the vent to the vacuum attachment.

I'm not going to do this to my saw but I'm thinking drilling a few well-placed holes would prevent a lot of this dust build-up.

Still more dust left behind. More dust at the rear of the saw.

I'm wondering if I remove that plate a few images back if it will do a better or worse job of extracting sawdust.

Accessory aluminum and silicon oxide disks can be used to cut metal. MicroMark sells two disks for cutting metal with this saw.  The aluminum oxide disk is for use with ferrous metals (iron, steel, etc.).  Both disks are approximately 3" diameter.

The silicon carbide disk is for use with non-ferrous metals (aluminum, brass, etc.).

The only use this disk saw before this photo was taken was to make four cuts for my home made blade plate.

The silicon oxide disk doing its thing. Tempered aluminum is no match for the mighty silicon oxide disk of mad cutting might.
Disks wear down really fast! I cut two aluminum backings for foam sanding blocks from this piece of aluminum.  I couldn't finish the last cut because the disk had worn so much it didn't extend above the saw table.  I had to finish the cut with my scroll saw.

I guess that's a reasonable amount of material cut with one of these disks but at over ten bucks each I think I'll be using my scroll saw for most of these type cutting tasks.

The plates are tempered aluminum approximately 2-3/4" x 3-3/4" by a little over 1/16" thick.

This saw just rocks.  If you're a scratch builder and especially if you like to make your own tools then you won't regret buying this saw.  There are a couple things that could be better and those things are available at an additional cost but when it's all said and done you'll find this saw can handle what we should be using it for.


Previous —
Next —

Scroll Saws for Model Building
Disk Sanders for Model Building

Comments about this article


Back to Model Building Tools
Airfield Models Home


Copyright © 2007 Paul K. Johnson