About Washes
|
 |
|
 Washes
is REALLY stinky! Washes
is REALLY stinky!
Have lots of ventilation!!
The Guild of Model Aircraft Shop Foremen advise that you give your Shop Foreman
a day or two off - with pay - so he may go outside and catch geckos while your
washes dry.

|
A wash is nothing more than dirty thinner. You can use any paint
that you like to make the wash
but some paints work better than others.
A wash can have several purposes and
a variety of colors can be used on the same item for different effects.
The most basic use for a wash is to blend all the details of a part to
make it homogenous. A wash helps make a part comprised of multiple
components look more natural.
These multiple
components may actually be individual pieces glued together or integral
details
molded on the part. In the latter case, shading is even more important
to disguise that these details were molded in place rather than attached.
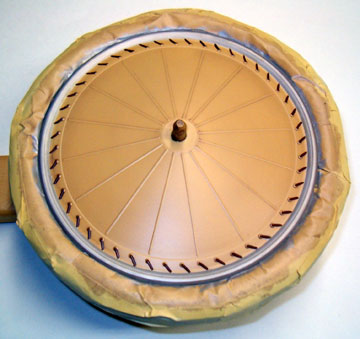
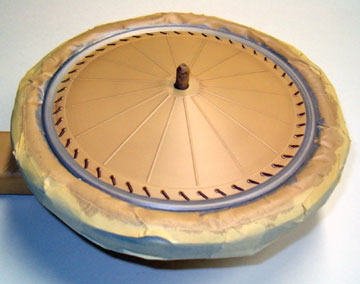
I've found a blending wash to work best if it is a dark shade of a color
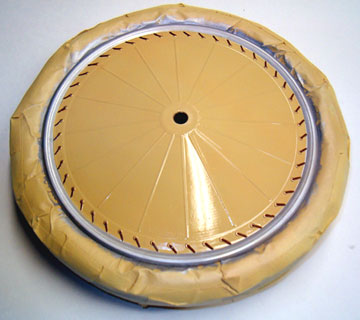
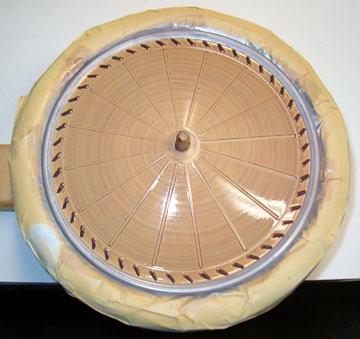
contained in most colors of the component. For example, this wheel has
a tan base, gold grommets and leather colored laces. Therefore I made
the overall wash from a base of brown as it seemed the most harmonious
color.
The next most common use of a wash is to create shadows (shading) around
details. This type of wash should be several shades darker than what
it will be next to. If you are in doubt about what color to use for a
wash, gray is almost always a safe choice.
So how do you create a shadow next to a black part? First, never
ever use black to paint any part of a scale model. It never looks
right. Always use a dark gray instead. It will look black when
it's finished.
You can either make the wash using black which doesn't always work or you
can use a different color. I like to use burnt sienna sparingly.
If you use too much of the sienna wash then the part will look rusty instead
of shaded. Another way to go is to use a light color such as gray or
tan (dirt) which will accentuate the corner but will not give the appearance
of a shadow.
Other uses for washes include creating oil drips, rust streaks or
rain-washed dirt.
|


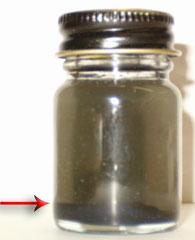 The
arrow in the photo to the right indicates the amount of paint in the
bottle. The bottle is then filled with thinner. Adjust
quantities to your preference.
The
arrow in the photo to the right indicates the amount of paint in the
bottle. The bottle is then filled with thinner. Adjust
quantities to your preference.