How to Dry-Brush
Study the part to determine what color highlights will look best. I
find that starting with the actual color of the base and then toning it down
with white works well. Color match isn't real important as long as
it's in the same family.
For example, any light shade of gray works
great for black parts. Use a pink for red parts, baby blue for
darker blue parts, etc.
Never thin paint used to dry-brush!
You will also need a dark piece of construction paper to wipe the brush
on after you've dipped it in the paint. Don't
use white paper which will deceive you into thinking your brush is dryer
than it actually is.
The brush you use depends on the effect you want to achieve. A soft
bristled brush works best for subtle shading. A stiffer brush works
best for picking out highlights.
Again, the best way to learn these techniques is on inexpensive
plastic
models — not your scale masterpiece.
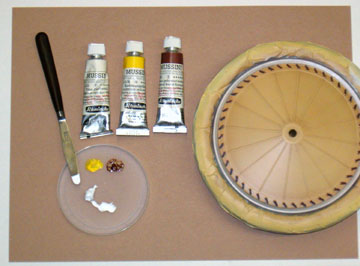 |
I begin by mixing a color that is a close approximation
of the original base color. The base was mixed from Klass Kote
epoxies. The dry brushed paint is oil. Although an exact
match isn't necessary you want something reasonably close. Some
experimentation may be necessary because you probably won't have the
same hues of oil paint as whatever the base paints were. |
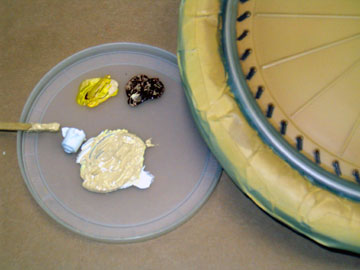 |
If you are exceptionally good at dry-brushing then you
can apply several coats with each coat being a lighter shade than the
previous dry-brush. The idea is to gradually change the tone
from the shadow areas to the most highlighted areas. I think that
is important for figure painting and other natural subjects, but not
important for most objects.
In the end it is up to your interpretation and taste. This
would be a good color to start with if you wanted to use multiple
dry-brush applications. I'm going to dry-brush only once (twice if
I don't like the first application) and leave it at that.
Therefore the color should be much lighter than shown here. |
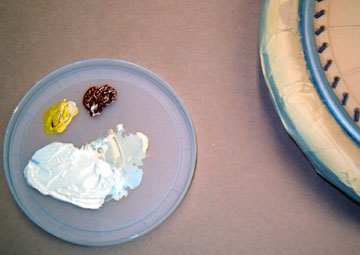 |
I added a small amount of the color above to the
remaining white. If you use the same technique you have to be
especially careful in your application or you can easily overdo the
effect. |
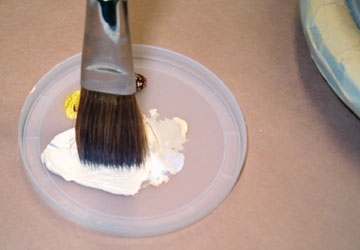 |
Dip just the ends of the bristles in the paint.
Don't swirl it around. You want the smallest quantity of paint
possible on the brush. |
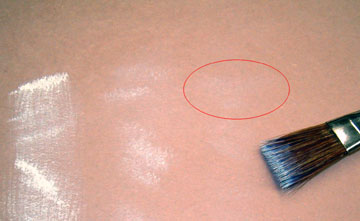 |
Now brush the paint off on something dark. I buy
packs of cheap construction paper from a craft store. Notice
the circled area. The paint can still be seen on the paper so
there is still too much on the brush. Move to a clean area of
paper and brush off more paint until the paint is difficult or
impossible to see. |
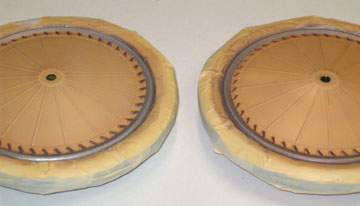 |
Now brush over all the highlights. Don't worry that
you can't see it at first. Just keep building it up until you can.
If a part has significantly different colors then you should also
dry-brush different colors. You'll have to use a smaller brush so
that you avoid getting the wrong color on a part.
Only the wheel on the left has been dry-brushed. Unfortunately, the
effect is difficult to see in these photos.
I took probably 25 shots and not a single one of them showed the effect
to good advantage although it's easily seen in person. I finally
gave up on trying to photograph it. |
 |
One other thing to note is the distance the viewer will be (on average) from the model. Weathering, shading
and highlighting needs to be more subtle if the viewer is close to the model. If the viewer will be farther
away you will need to exaggerate the technique more.
Think of it as similar to the difference between a woman wearing make-up to go to work vs. an opera player. Stage
performers greatly exaggerate their make-up so people can see the effect at a greater distance.
Another thing you can look at is buttons for Windows 3.0, 95 and 98. Apple and Microsoft undoubtedly took a
lesson from model builders when they designed their OS interfaces. I used the same techniques when designing
the theme for this web site to give it a more three-dimensional look.
Note the exaggerated highlighting and shadows in the Windows 3.11 Minesweeper game to the left. |
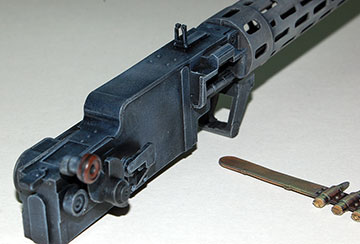 |
This is
Williams
Brothers 1/4 Scale Spandau Machine Gun kit. The breech is
sprayed with 80%
gray. The dry-brushing is lighter grays with a final dry-brush application of white applied very lightly. |
All that's left to do is apply a protective clear coat. The paints
used are not fuel proof and will rub off with handling. I like to use
clear epoxy paint because it is extremely durable, fuel proof and it's
actually clear — not yellow. Another very important purpose of the clear
coat is to even the overall sheen of the part. The clear coat can be
whatever degree of gloss is appropriate. In the case of glow-fuel
powered models the clear coat should also be fuel proof.
If you are building a display model then you may want to add various
ground pastel chalks to give the effect of dirt, dust, etc. Some
people put chalks on prior to the clear but the clear will diminish the
effect significantly so you have to guess how much extra to add to account
for it.
I add chalks after the final clear and then don't handle the model in any
way that would remove them. This won't work for a flying model
aircraft as the chalks will come off in use or from cleaning the model. |

