Painting
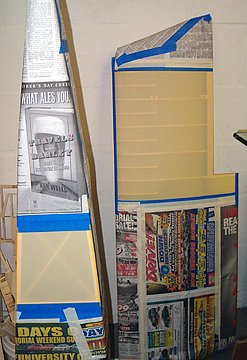 I masked the wing panels and fuselage for the white areas and applied one
light coat of
Klass Kote white epoxy. The rudder was also painted white. I did
not attempt to make the white totally opaque as it would have been inappropriate
compared to the rest of the model which is translucent. In fact, one coat
slightly heavier than a dust coat was plenty. I masked the wing panels and fuselage for the white areas and applied one
light coat of
Klass Kote white epoxy. The rudder was also painted white. I did
not attempt to make the white totally opaque as it would have been inappropriate
compared to the rest of the model which is translucent. In fact, one coat
slightly heavier than a dust coat was plenty.
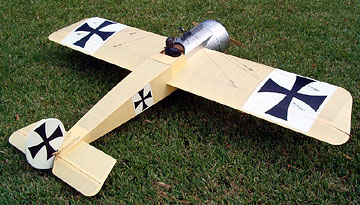
Next I applied the vinyl decals per the instructions. Spray Windex
lightly on the surface to apply the decal. Then spend as much
time as it takes to fully squeegee the decals. It is possible to work out
every single bubble.
The instructions state to peel off the "leaves" of the Maltese crosses from
the backing one at a time and then spray with Windex to prevent them from
sticking to each other. That was a great idea I never would have thought
of and it worked very well for me.
In some cases the paper backing came
apart and left a thin layer on the decal. Some time with a sharp tweezer,
more windex and rubbing with a wet sponge was irritating, but necessary and any other method of
getting the decal to the model would have been far worse.
The moral is to
apply enough Windex to prevent sticking, but don't douse the decals while
they're on the backing.
It took me approximately 20 minutes to squeegee one Maltese
cross on the wings. The smaller decals on the fuselage and rudder took
significantly less time.
 After the decals dried for three days, I sprayed a very light coat of satin
clear Klass coat around the edges of each decal. I tested before hand and
found that a wet coat would curl up the edge of the decal and ruin it. A
second light coat was applied after the first cured for about five hours.
The next day I sprayed a slightly heavier coat. This fully sealed the
edges of the decals without any damage. After the decals dried for three days, I sprayed a very light coat of satin
clear Klass coat around the edges of each decal. I tested before hand and
found that a wet coat would curl up the edge of the decal and ruin it. A
second light coat was applied after the first cured for about five hours.
The next day I sprayed a slightly heavier coat. This fully sealed the
edges of the decals without any damage.
One medium-heavy coat of satin clear was sprayed over all the fabric and
painted/decaled areas
after masking off the aluminum. The covering looks much more realistic
with a slight sheen that very closely resembles a doped finish. Use satin
hardener — this model should not be glossy!
The clear
coat protects the SolarTex from staining and the edges of the decals from
lifting when cleaning the model. Even so, it is a good idea to clean the
decals from the middle to the edges and not tempt the decal gods.
All black parts (landing gear, trapeze assembly, tail skid support, etc.)
were painted using 80% gray Klass Kote mixed using their white base and satin black
with satin hardener.
|


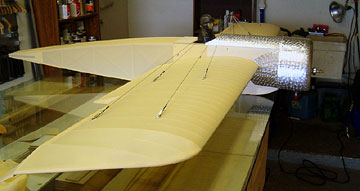 Antique SolarTex was used for the entire model except where aluminum is used.
A 30 foot roll of this covering is available from SR and is more than enough to
complete the model and possibly another smaller model.
Antique SolarTex was used for the entire model except where aluminum is used.
A 30 foot roll of this covering is available from SR and is more than enough to
complete the model and possibly another smaller model.