![]()
|
|
|
|
|
|
|
|
|
|
|
|
|
|
|
|
|
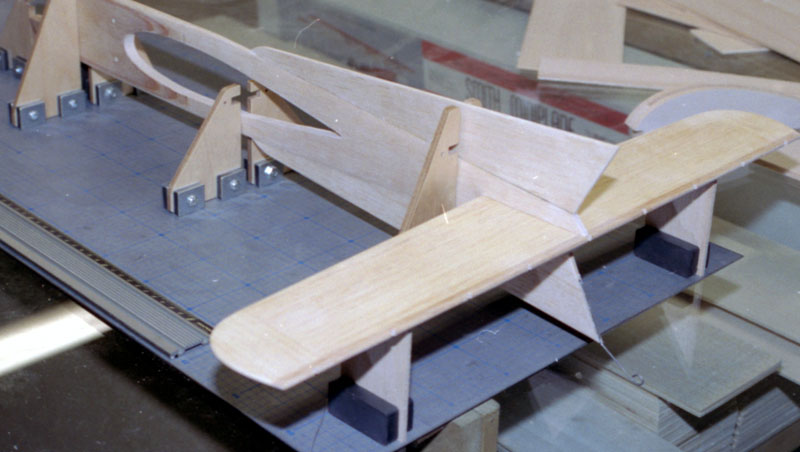
ConstructionThe DoodleBug 330 is a small Control Line model aircraft designed for .15 to .25 size engines. The 330 is the smaller of two sizes that I know are available in plan form. The larger is the DoodleBug 440 for .35 engines. Both models were designed by "Wild" Bill Netzeband who is well known in the control line fraternity. The model has a unique appearance which has grown on me over time. When I first saw the plan I thought it was cute in an ugly sort of way. The more I look at it, the more I like the lines.
Nevertheless, the wing structure is light and strong while being relatively simple. The fuselage is of typical profile construction. A balsa sheet comprises the bulk of the body. A pair of hardwood engine mounts are placed in cut-outs in the balsa and then both sides have plywood doublers laminated from the nose to the thickest point of the wing.
The sanders performed very well in the areas where I used them. I used the medium and fine blocks to shape the aft fuselage to an oval shape. I used the coarse, medium and fine blocks to work on the plywood doublers. The Sup-R-Sanders greatly reduced the time I would have spent shaping these with conventional sandpaper. However, even the finest of the blocks is fairly coarse, so after the shaping was complete I switched back to regular sanding blocks to finish the job.
I capped the ends and added a hard balsa stick to the trailing edge of the stabilizer and the leading edge of elevator. That helped prevent the part from warping.
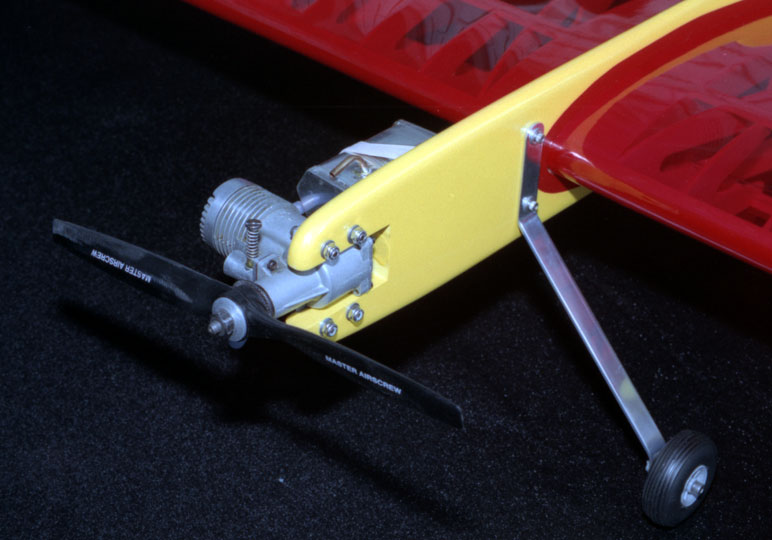
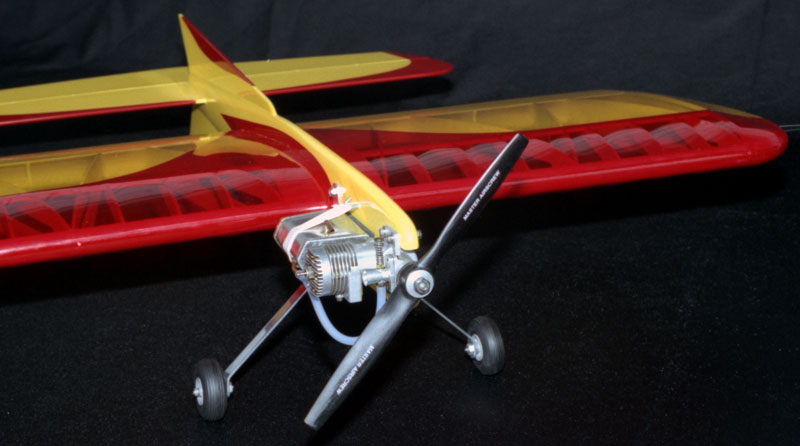
Part of the specification for building this model was to substitute a removable landing gear rather than follow the plan which shows a permanently installed music wire gear. The reason for this is so the model can be boxed more easily for transportation. The gear shown on the plan looks to be perfectly adequate. Other than making the gear removable, it was left to me as to how to do that. I chose to cut the gear from dural aluminum. The gear bolts on through the hardwood engine mounts. After bending the gear to shape, I spent a fair amount of time sanding and polishing the gear. The photos don't do it justice.
|
|
|
Finishing
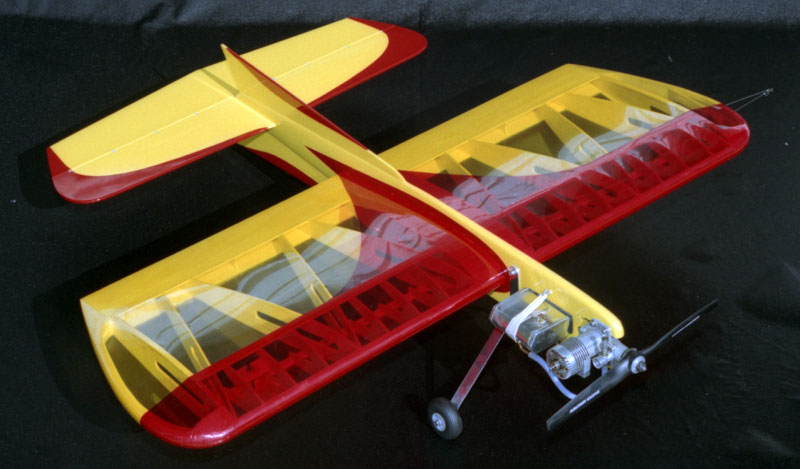
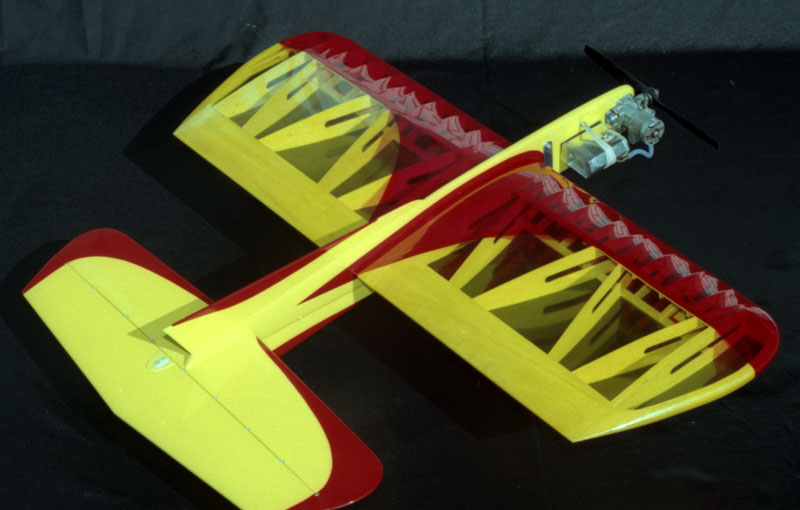
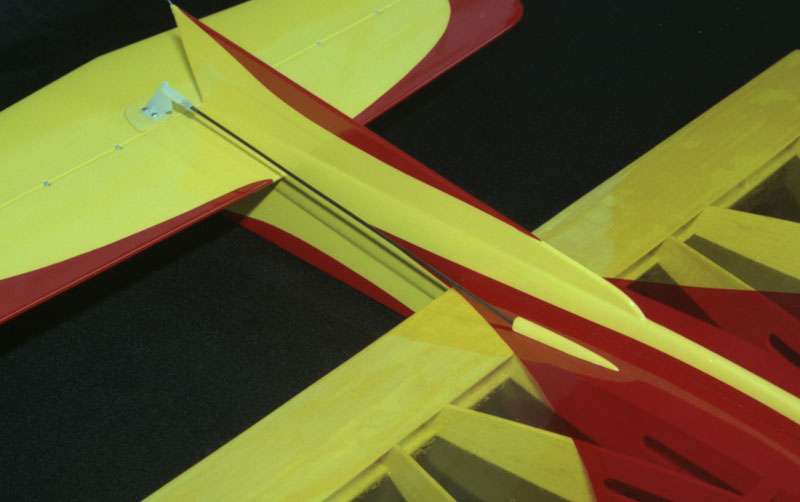
If I were to do it again, I would glass the fins separately and glue them on prior to priming. The stabilizer was fiberglassed separately and glued on immediately prior to priming the model. The model was primed and painted using Klass Kote Epoxy Enamels. These paints are a pleasure to work with and provide a very nice finish that is fuel-proof, durable and has that glossy-wet look that only enamels can provide. After spraying the first coat of primer I used some squadron green putty to make small fillets around the stabilizer and fins. The primer and putty were sanded. A second coat of primer was sprayed to fill areas in the weave that weren't completely filled. A thorough wet sanding readied the model for color coats. The base color is Klass Kote Yellow #160. Two light mist coats followed by one wet coat gave good coverage. One area where I had partially sanded through the primer was darker than the rest of the model so I sprayed another coat of yellow in that area. The trim was sprayed the following day using Deep Red #204. One coat provided excellent coverage. See my Klass Kote paint product evaluation for more details about this paint. If there is one thing I don't like about building control line models it's the fact that often the control system is built in and can't be added later. That means there are pushrods and lead-outs that are in the way from the time they are installed until the model is completely finished. I contemplated the options and soon realized the only one available was to gripe about it. So I did.
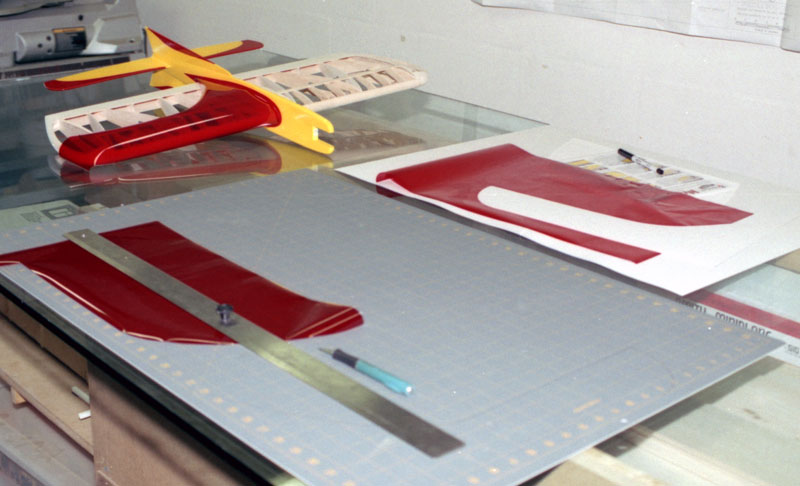
It would have been easier to cover the wing separately, but the fit was tight and the wing probably would have been damaged had I tried to slide it in place after it was covered. I centered the wing and permanently glued it in place when covering was completed. I was asked to use a transparent color scheme of my choice on the wing to show off the structure. I chose to use Oracover Lite iron-on film because it is very light and also goes around compound curves better than heavier coverings. The wing tips on this model are fairly thick so a lot of heat of and stretching was need to coerce the covering into place. As far as films go, I've never been very fond of them, but Oracover Lite is probably one of the easiest to apply and is used on several of the models in the gallery that have transparent finishes. It is available from Hobby Express. By the way, one of the photos below shows a piece of red covering on the wing. It was placed there to check that it was cut properly, but not ironed down at that point. I actually joined the yellow and red covering on my glass bench top prior to ironing the covering on the wing. Originally I was sent an unmarked .15 (brand unknown) engine to install. We had concerns about the performance of the model at its finished weight with this engine, so it was replaced with a Fox .19. As of this writing, the model has not been flown, but hopefully I will have a flight report soon.
|
|
|
|
|
|
|
|
|
|
|
|
|
|
|
Copyright © 2004 Paul K. Johnson
|
|


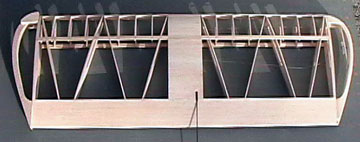 Initially
I was told that the wing is of geodetic construction. I have never
built a true geodetic wing, but it is on my list of things to do.
After having built the DoodleBug, I still haven't actually built a geodetic
wing because this wing simply has diagonal ribs and is not geodetic
construction.
Initially
I was told that the wing is of geodetic construction. I have never
built a true geodetic wing, but it is on my list of things to do.
After having built the DoodleBug, I still haven't actually built a geodetic
wing because this wing simply has diagonal ribs and is not geodetic
construction. Maybe it's
just me, but I've never liked the look of the raised edge of plywood
doublers. Therefore I rounded them into the fuselage around the
perimeter and tapered them to fair into the fuselage at their rear edge.
The bulk of the sanding was done with
Maybe it's
just me, but I've never liked the look of the raised edge of plywood
doublers. Therefore I rounded them into the fuselage around the
perimeter and tapered them to fair into the fuselage at their rear edge.
The bulk of the sanding was done with
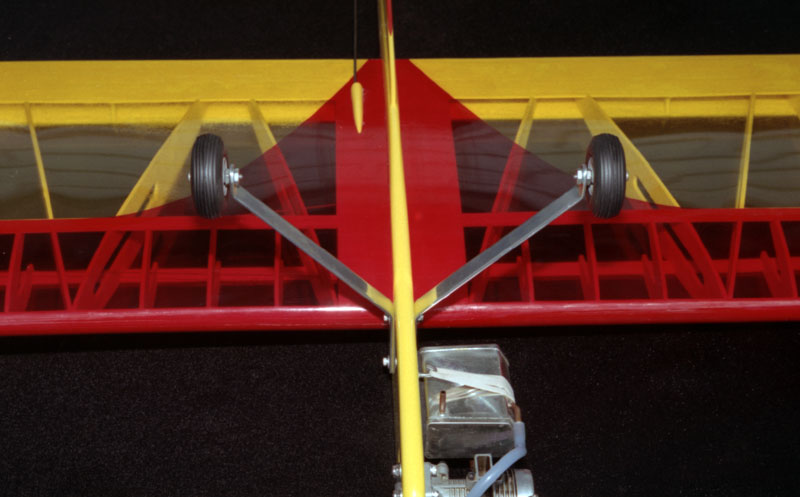
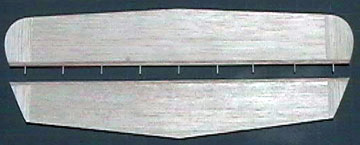 Probably
my favorite feature of this model is the symmetrical fins. In fact, I
really love they way they look. The one thing I did not like about the
model is that the large stabilizer is very thin and prone to warping.
Probably
my favorite feature of this model is the symmetrical fins. In fact, I
really love they way they look. The one thing I did not like about the
model is that the large stabilizer is very thin and prone to warping.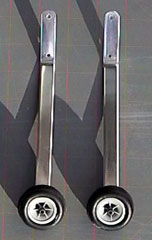 Because
the control surface is so thin and I wanted to use "real" hinges rather than
CA hinges or similar, I chose to use Robart 1/2A Hinge Points. Because
they have a plastic pivot point and that control line models are often
subjected to extreme throws, I chose to use plenty of them
— 9 in total.
Because
the control surface is so thin and I wanted to use "real" hinges rather than
CA hinges or similar, I chose to use Robart 1/2A Hinge Points. Because
they have a plastic pivot point and that control line models are often
subjected to extreme throws, I chose to use plenty of them
— 9 in total.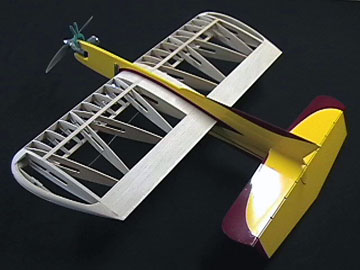 I
chose to
I
chose to
 The wing was slid into the fuselage
after painting was complete. It was left loose to ensure the covering
edges would be "inside" the fuselage.
The wing was slid into the fuselage
after painting was complete. It was left loose to ensure the covering
edges would be "inside" the fuselage.