Airfield Models - Model Aircraft Engines

How to Make a Backplate Gasket for a Model Airplane Engine

December 19, 2021


Home
About
What's New
History
Models Gallery
Model Building Safety
Articles
Mail & FAQ
Site Map
Site Feedback
Contact
Add to Favorites
Comments
Search Airfield Models

Back to Model Aircraft Engines


Airfield Models (http://www.airfieldmodels.com/)How to make a Backplate Gasket for a Model Aircraft Engine

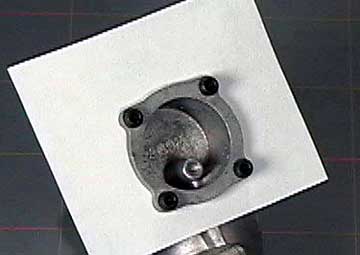
Often the backplate gasket tears when disassembling an engine.  If you've ever looked at the cost of replacement parts you will see that you certainly do not get your money's worth when you have to replace a part like this.

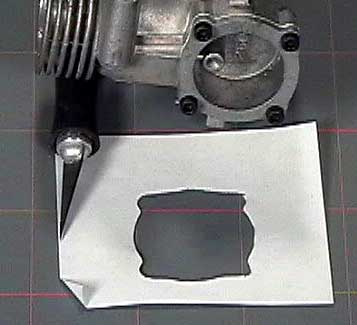
I have made many gaskets from paper or cardstock depending on the thickness of the original gasket.  I would prefer to use a material designed for the purpose, but I've had no luck finding anything.

I have checked a few auto parts stores but the gasket materials carried are not even close to the thickness required — they are always much too thick.

Fortunately, these paper gaskets I have made have worked fine.  I've never had any kind of problem with them such as leaks or the gasket breaking down.


Making the Gasket

An assortment of tools used to make the gasket All of the tools shown here are not required.  The photo simply shows the options you have for measuring and cutting the gasket.  Use what you've got.

Also shown are three tools that can be used to measure the hole for the backplate — a caliper, ruler or circle template.  Again, use whatever tool you have.

A drafting template used to draw circles used to measure the diameter of the gasket cut-out A circle template makes it easy to find the right size for the hole in the gasket.
The cut out is made with a knife or a compass with a blade I use a cutter in a compass to cut the hole because it is fast and accurate.  Again, it is just one way to do it.

If you draw a circle and cut freehand with a hobby knife it will work just as well.

Put the over-size gasket on the engine with the backplate and punch a bolt hole using a toothpick Cut the gasket from the sheet of paper and slide it over the backplate.  Put the backplate in the crankcase and line it up properly.

Use a toothpick to punch a hole for one of the bolts.  I don't punch all the holes at this time because the paper might slip and some of the holes might not line up.

Thread the first bolt in and punch the holes for the remaining bolts Put in the first bolt finger tight and then punch the rest of the holes.
Tighten all the bolts Thread in all the backplate bolts and snug them.
Trim off the excess gasket material Use a sharp blade to trim off the excess.  That is all there is to it.  Normally I pull the backplate off and oil-soak the gasket.  I think it helps to ensure that the backplate is sealed, but it might not do anything at all.

So far I have had no problems and I have been making gaskets like this for many years.


My thanks to Heinrich, an automotive engineer who e-mailed me to inform me that it is indeed a good idea to grease the gasket and both metal parts that it mates with to ensure a good seal.


Previous —
Next —

How to Assemble a Model Airplane Engine Carburetor
How to Assemble a Model Airplane Engine Part I

Comments about this article


Back to Model Aircraft Engines
Airfield Models Home


Copyright © 2004 Paul K. Johnson