 |
The first thing I did was keep my eyes open for a good
piece of cardboard — one that wasn't too ratty from various abuse and was
thick enough to be relatively rigid. It also had to be large
enough to be bent into an A-frame shape to make it even more rigid when
attached to my painting boards. |
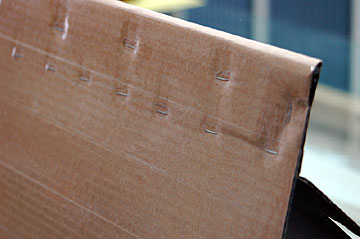 |
The cardboard was folded over at the top and stapled.
I originally used carpet tape to hold the fold closed but the joint came apart in less than a
day. |
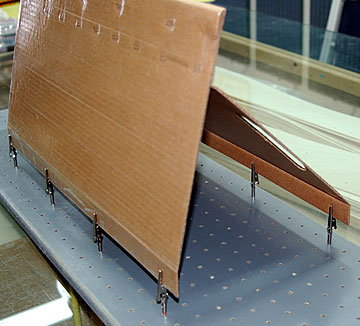 |
The entire face of the board is covered with clear
packing tape. The purpose is so that I can use masking tape to
hold parts to be painted and then remove it without tearing the
cardboard apart. The back of the board was bent approximately
45° away from the front face of the board.
This provides a great deal of rigidity to the setup.
Note that the lower edges of the front and back of
the board are bent to allow them to engage the alligator clips more
easily. |
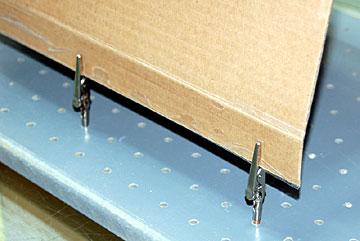 |
I made several short
extra hands having 1" wires soldered into
alligator clips. For this board, four clips attached to the front
and four more attached to the back made the set up very rigid and
stable. Even though it's just a piece of cardboard, the 20 or
30 minutes I spent making it right means I will have it a long time and
won't have to rig up something new every time I need a pallet. |
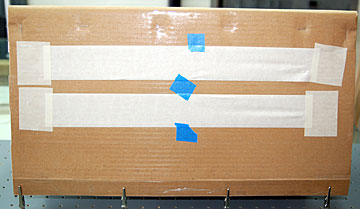 |
2" wide masking tape is used to hold parts to the board.
The long pieces have the sticky side up. Short pieces at the
ends secure the tape to the board. Tape one end to the pallet
and then stretch the tape taut before attaching the other end.
A couple short piece of tape in the middle of the long pieces of
masking tape help prevent the tape from whipping around while airbrushing.
If the parts to be painted are small and there's a lot of them, I could
have used two more strips of masking tape to hold them assuming they all
need to be the same color. |
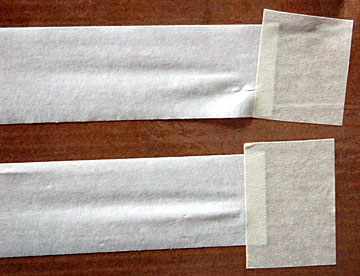 |
It doesn't take much tape to hold the long pieces in
place. When you're finished, this tape will peel off the
packing tape without damaging anything. |
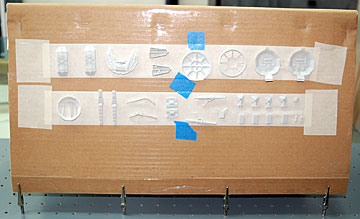 |
In practice, I prepare every part of the model for paint
before I paint anything. Every set of instructions that comes with
a plastic kit says don't remove parts from the sprue until you're ready
for them. I'm ready for them immediately because they all need
to have flash removed and
mold marks sanded off or filled. So I go ahead and
remove all the parts from the sprues when I start the kit.
When all the parts are ready for paint, I sort them by the first
color to be sprayed on them so I can do them all at once.
In this image I just grabbed random parts of the
AMT/Ertl Darth Vader Tie Fighter I was about to build to show how it works.
At this stage most of the parts aren't even ready to paint and I have no
idea what colors they're supposed to be. After I took this photo I
removed all the parts and put them back in the box. |
 |
Be sure to leave
enough room between them so you can spray the edges and sides without flooding a
part that is too close. Small parts are often better held by a
small self-closing tweezers or alligator clip. Wet paint can soften
the glue on the tape and allow the part to fall off and get lost.
Note: I always paint the least important side of the part first. When
the part is turned over to paint the other side, the tape could damage
the paint on the first side. I haven't found it to be a problem if the paint is
actually allowed to dry but why tempt fate. Paint the most
important side last. |
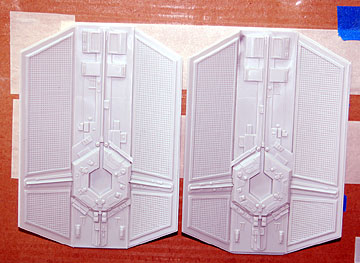 |
Large parts can be painted the same way but more than one
piece of tape may be necessary. Sometimes there are no flat
areas on a part which makes attaching the part to tape more difficult.
Usually you can get the tape to stick if you work with it long enough.
In cases where that can't be done, then you may need to revert to
alligator clips or put the part on a pallet laying flat
on the table. By the way, there is no way I would spray these parts
with them this close together on the board. That's just asking for
problems. |
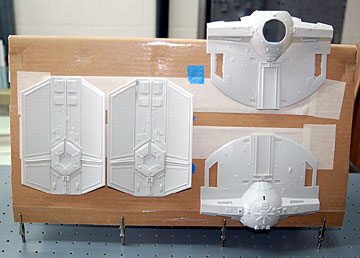 |
This is another "for effect" photo.
In practice, I will
glue the top and bottom of the hull together, fill any visible seams and
then paint the entire component. |
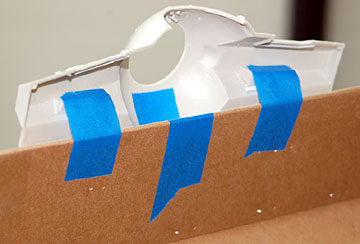 |
The hull piece at the top of the pallet has protrusions
on the inside that make attachment to the masking tape precarious.
A little help was enlisted through additional pieces of masking tape to
ensure the part doesn't fall off when it is being painted.
Depending on how you do things, it might be worth have two or three
pallets so you don't have to wait for parts to dry before moving on to
the next set.
When you're finished with the pallets, remove the masking tape, wipe
off loose over-spray and put them someplace safe until next time. |

