Airfield Models - Rebuilding My Stik 30

My Stik 30 Rebuild

December 18, 2021


Home
About
What's New
History
Models Gallery
Model Building Safety
Articles
Mail & FAQ
Site Map
Site Feedback
Contact
Add to Favorites
Comments
Search Airfield Models

Back to Rebuilding My Stik 30


Airfield Models (http://www.airfieldmodels.com/)Rebuilding the Front End

The main problem with the model was the length of the nose and the only modification that was actually required.  The nose was simply too long which made the model impossible to balance without very poor weight distribution.


The portion of the nose that was sawed off. I removed 1-3/4" of the forward fuselage.

The length removed from the right side was slightly more than that because I added 2° of right thrust.  I also added 2° of down thrust.

The original model had no built in thrust adjustments.

The new firewall and forward upper deck. After sanding the nose flat I stood the fuselage on a piece of plywood and traced the inside of the fuselage to create the firewall.  Some sanding and fitting resulted in a good fit.

New triangle stock was added behind the new firewall.  The firewall itself is a little thinner than the original which was built from 3/16" aircraft ply.  The new firewall is metric ply approximately 5/32" thick.

The throttle pushrod is on the opposite side of the firewall from where it was.  I carefully removed the servo mounts and flipped them over because the throttle servo is smaller than the other servos.

The old nose shows how long the model used to be. Here you can see how much the nose was shortened.  At this point I installed all the equipment and pinned the new tail in place.

The model was still slightly nose-heavy.  I decided to move the elevator servo to the rear of the fuselage.

Since the majority of the new finish will be aft of the Center of Gravity (CG) I was confident the model could easily be balanced by placing the battery somewhere in the area from the trailing edge of the wing to behind the firewall. 

Very good muffler location.  Very bad carburetor location. Besides being a fuel hog, the Wankel also leaves the biggest mess you've ever seen on a model.  Ask anybody who owns one.

I definitely wanted the exhaust under the plane.  With no other consideration I did exactly that.   If I'd thought about this for even two seconds I never would have mounted the engine like this.

Look at the location of the carburetor.  It is so low that getting the engine to run reliably with a low idle is nearly impossible.

The other problem is that fuel siphons out of the tank even with the carburetor closed.  That means as soon as the tank is filled the fuel starts leaking out.

After two days of flying with the engine in this position I changed its orientation.

The engine had to be rotated.  The original engine mount holes were filled using flat head screws to prevent fuel and oil from entering the airframe. 
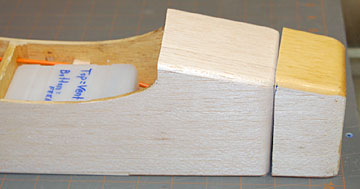
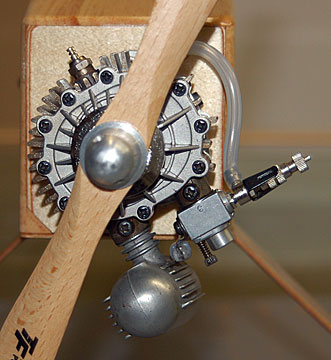
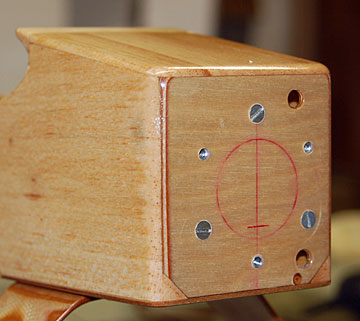
I was hoping I would be able to rotate the engine in the mount but it didn't work out because the muffler didn't clear the fuselage side.  I had to rotate the mount.

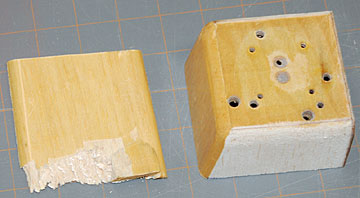
I was going to knock out the original blind nuts, drill out the holes, plug them with dowels and then fuel proof them.

Instead of doing all that I counter-sunk the holes and threaded flat-head screws into the existing blind nuts.  I applied silicone to fuel proof the wood exposed by the counter-sink.

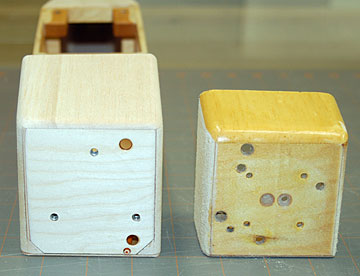
The fuel line exits didn't need to change but the throttle linkage location did.  I plugged that hole with silicone.

I can't believe I'm already rebuilding my rebuild and it isn't even rebuilt yet.

A much better carburetor orientation. This is the new orientation of the engine.  The muffler location means a messier airplane, but at least the engine will run properly with this carburetor position.

I'm not a fan of exhaust deflectors because I don't think they work.  At least I've never noticed a difference.  But the Wankel is so messy that I decided to try again.

It didn't work.  Wankels run very hot and the deflector actually made the engine smoke.

Note that I added a wing fairing.  The model never had a fairing before and always looked unfinished.


Previous —
Next —

Rebuilding My Stik 30
Rebuilding Between the Nose and the Tail

Comments about this article


Back to Rebuilding My Stik 30
Airfield Models Home


Copyright © 2006 Paul K. Johnson