|
|
Building
the
Thunder Tiger Raptor 30 V2 Helicopter — Steps One
and Two
If you are a normal person — you know... one who's awake during the day and
asleep at night, then it should be about 6 am. Take a shower then
impatiently eat a good meal while you look forward to building your excellent
new toy.
Note that the first image(s) for each step are the grayscale images from the
Raptor V2 instruction manual. |
|
|
|
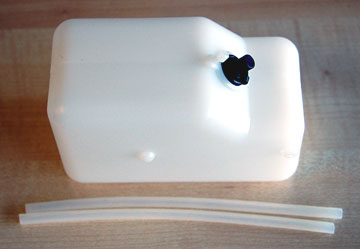
Step One
— Fuel Tank Assembly
- This step is on page 5 of the Instruction Manual.
 |
The instructions indicate that you must build the fuel tank but it comes
already built.
Pull out the stopper and inspect the fuel line for damage. Rinse the
tank and line and allow them to dry thoroughly before reassembling the tank.
No, you may not take a break now. |
 |
Do not connect any fuel tubing to the outside of the tank until the model is
completely built and set up. There's no point in having the tubing in
the way and abrading it against various assemblies in the heli while you're
working on it.
You might want to connect the two nipples with a short piece of tubing to
keep crud out of the tank. |
|
|
|
|
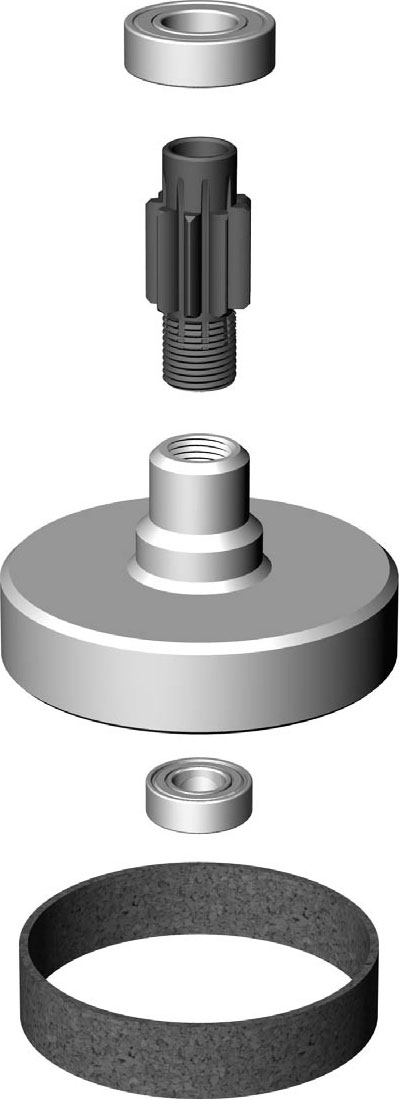
Step Two — Clutch Bell Assembly
- This step is on page 5 of the Instruction Manual.
 |
|
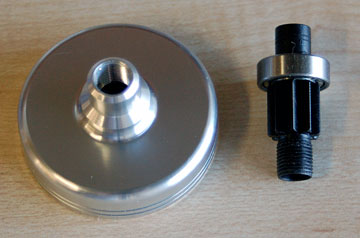 |
Parts for this assembly. |
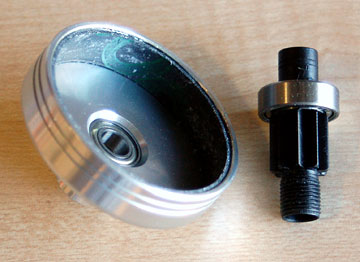 |
The clutch liner is already installed as is the lower
bearing. All you need to do is thread the drive gear into the
clutch
bell. |
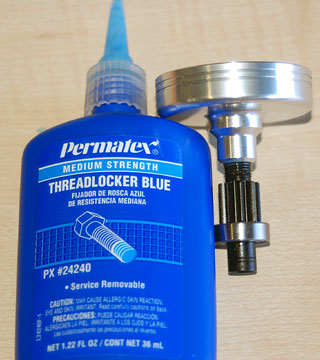 |
Clean the threads of both parts using alcohol. Apply Loctite before
threading the parts together. Never apply Loctite to plastic
parts. First, it doesn't work on plastic. Second, it may
attack the plastic.
Use Loctite only on metal-to-metal parts. |
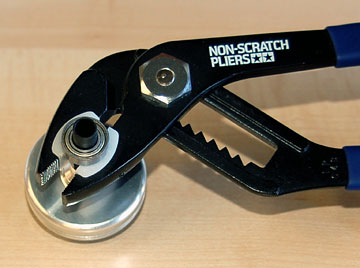 |
The instructions give no indication of what tool(s) you should use to
tighten the gear to the bell. I suspect that if you hand tighten it
then it will become tighter as the helicopter is run, but I could be wrong
about that. I used nylon jaw pliers (Tamiya) to grasp the gear and tighten
it. |
|
|
|
|
|
|
|
|
Back
to Thunder Tiger Raptor 30 V2
Airfield Models Home |
|
|
|
Copyright © 2006 Paul K. Johnson |
|