Drilling Rules and Tips
Safety
This is where I give you the standard lecture about being safe. If you
ever saw "City of
the Living Dead" then you know that a horizontal boring machine can easily
drill into your skull, through your brain and out the other side of your skull.
And the sadist father of the girl you were groping earlier who does the drilling laughs
the whole while. He may think it's funny now but he won't think it's so
funny when his expensive drill bit becomes rusted and useless due to being
covered with wet brain matter. But that's his problem.
For your personal safety you should avoid being around drilling machines and hanging out with your sadist friends
at the same time.
Also, don't use a corded drill when you're taking a bath.
Drills can hurt you badly. I've stuck a finger into a spinning drill in
my drill press on more than one occasion and the results weren't pretty.
Loose clothing is a really bad idea. Please, please, please, please take
this stuff seriously. A drill doesn't have to be big and powerful to hurt
you. Most drill presses have a belt drive and can have a lot of torque
which means the bit grabbing your shirt sleeve or tie, pulling you into the
tool, probably breaking some part of your hand and arm, cutting you deeply and
your face being tightly against the drill press plus you being freaked out and
unable to hit the off switch as quickly as needed.
Drilling Speed
Craftsmanship Rule #1:
If you are unfamiliar with the material you are drilling OR
you are unfamiliar with the drill bit OR you are familiar with both the
drill bit and the material but unfamiliar
using that bit in that material then test drill some scraps of the same material
to figure out the best drill speed and possibly try different bits to get better
results.
In general you want to use the highest speed that allows the bit to drill
quickly and remove material. High speed = cleaner holes. Hard
materials don't allow the bit to drill very quickly which means you must use a
lower speed to prevent the wood from burning and toasting your bit. If
your bit changes color due to heat you've ruined it. If you were using the
correct type bit then next time use a slower speed. If you weren't using
the correct type bit then next time use the correct type bit and a slower speed.
Most drill presses use a pulley and belt system. That's because there
is no one right speed for a drill press. It takes about thirty seconds to
change the setting so get into the habit of doing it instead of being lazy and
just going with however the drill press is currently set.
Drill Press Belt Combinations
| Drill Bit RPM |
Pulley on Motor |
Pulley on Arbor |
Materials |
| Low |
Small |
Large |
Metals, low
temperature plastics, hardwoods or any wood with deep or large holes. |
| High |
Large |
Small |
Any material that
will tolerate it. Whenever possible drill plastics at high speeds
but lower the bit slowly to shave the plastic for a very clean hole. |
What I actually do when I really care about the quality of whatever I'm
making is drill test holes until I find the drill press speed that achieves the
best quality. That is especially true when drilling holes with forstner
bits into expensive hardwood.
Any time you're drilling a material that allows the bit to cut in quickly go
with a higher drill speed.
If you're drilling metal or using a forstner bit then go with the small
pulley on the motor and the large pulley on the spindle to lower the drill bit
RPM. Forstner bits drill very slowly and get very hot very fast. If
you use them on high speed you're going to have burnt holes.
Metal cuts slowly as well. If you use high speed to cut metal you are
going to over-heat the drill bit and ruin it.
Balsa, pine, spruce and other softwoods drill easily but also tear-out
easily. In this case you want inertia on your side. By that I mean a
slower drill speed will allow the wood to move instead of cut. Assuming
you're using a sharp bit all that tear-out you'll get on the face is due to
using too low of a drill speed. Tear-out on the back means you didn't use
a sacrificial backer board.
By drilling soft woods at high speed the bit hits the wood and cuts it while
the wood never saw it coming. Instead of throwing it's fibers around to
frustrate you they get cut cleanly.
Accuracy
If you really care about accuracy then a drill press is the way to go
whenever possible. If you need to drill holes in the firewall that's
already glued into the fuselage then getting the whole thing rigged up under a
drill press may be impossible or possibly just extremely difficult. Your
best bet will be to use a hand drill. My rule is to drill any holes using
a drill press as soon as possible to avoid situations where I have to use a hand
drill. For example, I always build (drill) my firewalls before I glue them
into the fuselage. It makes a huge difference in both accuracy and quality
of the drilled holes.
When you're using any type of hand drill be it an electric drill, Yankee push
drill or pin vise, the only way you will get consistently accurate holes is to
have some type of guide in place before you drill. That can be a center
punch mark, a pin prick or even using a very small diameter bit in a pin vise to
drill a slight hole into the wood.
For very precise work magnifying glasses such as reading glasses are
extremely helpful. I use them all the time and I'm amazed at how much
difference it makes. It's like somebody turned on the lights when I was
working in the dark. It really makes that much difference.
Using a hand drill, the softer the wood the less a center-punch is going to
help you. On hardwoods such as oak, maple and cherry a center punch is
helpful but it's not a guarantee. When you do use a punch don't hammer it
like a nail. Tap it to get a small indentation. Place your drill
allowing the punch to center the bit. Now back off the drill slightly,
bring it up to the lowest speed that's high enough to cut the wood. Place
the drill into the punched hole. Before the drill cuts past the tapered
point bring the drill up to its highest speed and continue drilling the hole.
If the speed is too low then the wood can grab the bit and move it
off-center. At this point it's almost impossible to get the hole centered
again AND have a clean hole.
On any wood harder than balsa there is a better way to have clean, accurate
holes. It doesn't work on balsa because it's simply too soft to force a
drill bit to do anything.
Drill a pilot hole that is much smaller than the finished hold. For
example, if you want to drill a 1/4" hole then drill a 1/16" hole first.
You don't have to drill all the way through but make sure the hole is at least
as deep as half the diameter of the finished hole. In this example, drill
at least 1/8" deep using the 1/16" pilot bit. Then drill the final 1/4"
hole.
Using a Pin Vise is a little different. For example, lets say I need to
drill the holes for the mounting screws of a small, thin plywood hatch.
Again, I would use a drill press but if I couldn't then I can still drill very
accurate clean holes.
For a hatch I will usually have four holes — one at each corner. I use
an accurate rule and sharp pencil to lay out the grid. At each point I use
a small needle (a sharp pin works) as an awl to mark the drill locations. It's the same as
center-punching but on a smaller scale. Just put it exactly on the mark
and push straight in then twist it back out. You now have a small guide
hole for a small drill bit.
Now that I have the guide I use a pin vise with a bit that's the finished size of the hole.
I don't drill a pilot hole because the sharp needle point provided a pilot.
The drill bit needs to be very sharp. I don't put a lot of pressure on
the bit when I'm drilling. Instead I spin the bit as fast as I can and
shave the hole. Again, use a backer board to prevent tear-out on the back
side of the hatch.
Remove the bit as often as necessary to clean out shavings.
When all the holes are finished I put the hatch in place where it will mount.
I usually have space around the hatch to allow for covering on the hatch itself
and the part that it mounts to. Plus I want the hatch to come loose when
the screws are backed out so I want a small gap all the way around. In
other words, I don't want a press fit that requires the hatch to be pried loose
when all the screws are removed.
So I cut some small strips of cardstock (business card) and slip them between
the hatch and the hole where the hatch goes. At this time I do want the
hatch to get stuck in place so I use equal amounts of material all around it
until it's wedged firmly in place.
Now I take the pin vise with the same bit and drill slightly into the wood
that will receive the mounting screws. It doesn't matter if you're using
wood screws that bite into the wood or machine scews that will go through the
wood and be secured with some type of nut.
If you're using wood screws then lightly mark all four corners with the drill
bit and then remove
the hatch. Replace the bit with the appropriate bit for the screw and
finish drilling the holes in the mount.
If you're drilling through then leave the hatch in place and continue
drilling using the same bit you used to drill through the hatch.
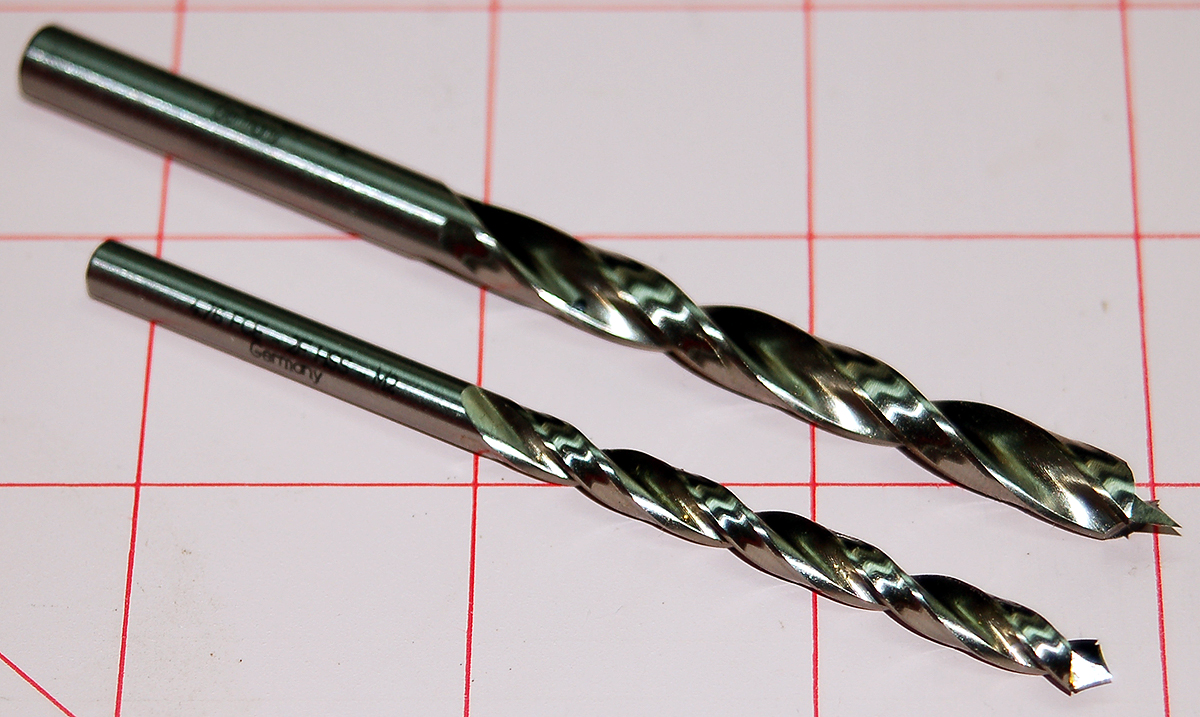
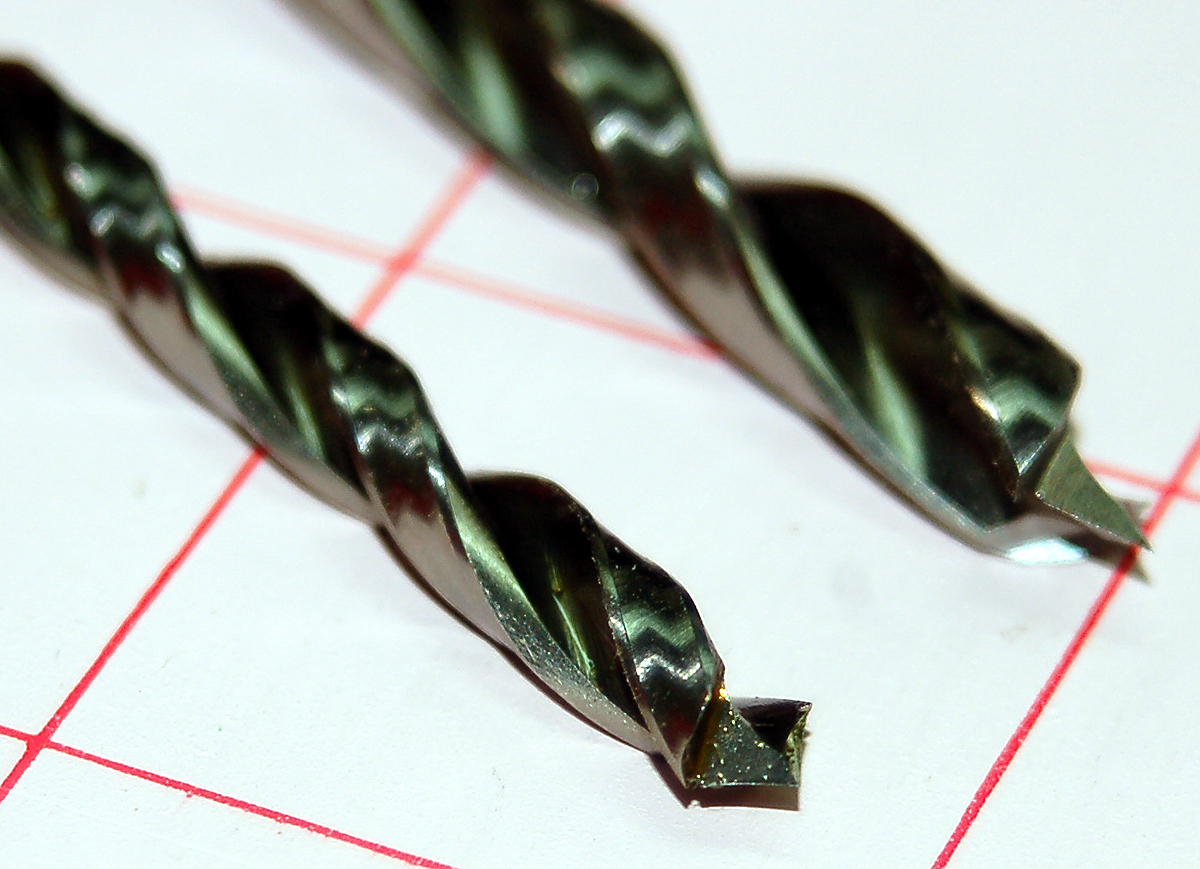
Sharp bits are always important but if you use a pin vise it will be more
readily apparent as you see the wood cutting cleanly instead of the bit grabbing
wood fibers and tearing them away. Electric drills of all types do the
same thing with dull bits.
|


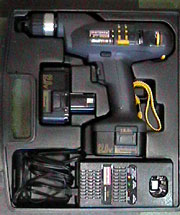 My first drill was a huge
corded 3/8" Craftsman that was a Christmas gift from my
mother. I was probably about age 15 and thought it was a great gift.
My first drill was a huge
corded 3/8" Craftsman that was a Christmas gift from my
mother. I was probably about age 15 and thought it was a great gift.