The
fixtures I use with my magnetic building system are mainly used to align the
structure and ensure it is square. However, it is sometimes useful to
have a vertical press. These simple additions to the fixture make them
more functional.
Note: The presses shown here do not
match the measurements of the drawings. I made these so they
would be consistent with fixtures I already have. The drawings are
an improved version.
Instead of tapping the presses, you may
want to purchase T-nuts that can be inserted in the underside of the
presses. The choice is yours.
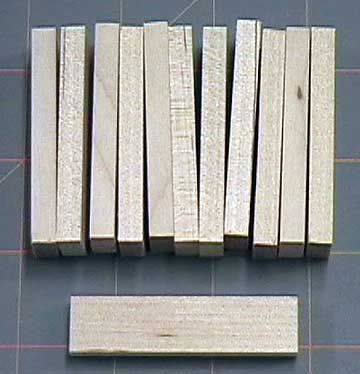
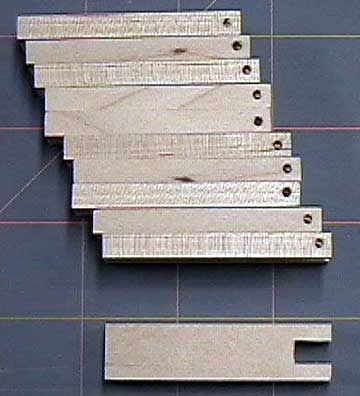
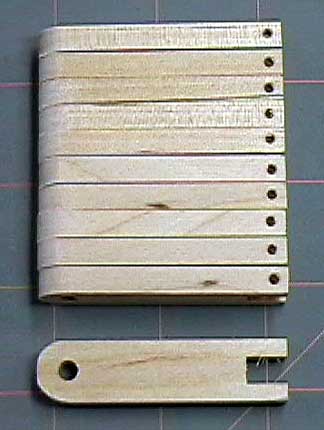
Make the vertical presses from a good quality
hardwood that will last. I cut these from good quality 1/4" hardwood using my
Microlux table saw.
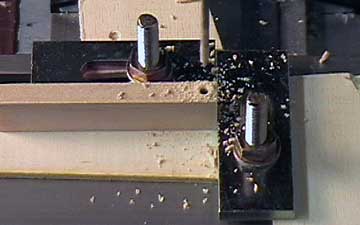
A 2-56 x 1" socket head bolt is used to
clamp the press to the fixture. Drill a 3/32" hole to pass
the bolts as indicated on the drawings.
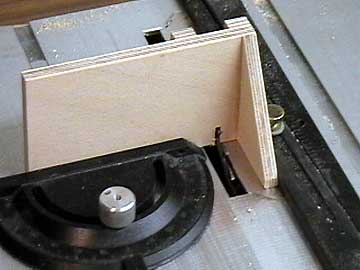
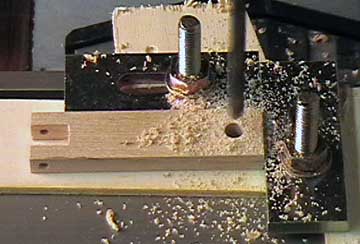
There are several ways to make the
cut-outs in the presses. I use a simple fixture so I can
slide the blanks through the table saw.
The fixture takes about 20 minutes to
make. It will speed things up considerably as well as ensure
consistency and accuracy.
If you do not have a table saw, then a
scroll saw or razor saw and hobby knife will get the job done.
A triangle is glued to the back side of the
fixture to hold it square to the table. The fixture is
held tightly against the miter gauge and the fence when moving the part
through the saw.
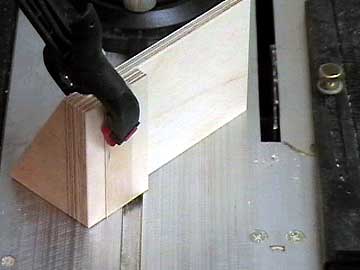
Each blank is placed in the fixture and pushed down so it
is flat on the table. It is then clamped in place. After
making the first cut, flip the blank around and make the second cut.
The vertical press should be a slip fit on the magnetic fixture.
Remember that each adjustment is multiplied by two because the blank
gets flipped around. Therefore, if the slot is 1/16" too narrow,
then the fence only needs to be moved 1/32".
The Accurizer II fence sold by
Micro-Mark (Micro-Mark catalog# 80467)
makes it simple to zero it in.
It appears that I have way more of these
things than I will ever use unless I start my own factory. I already
had a handful of them and made these simply for this how-to.
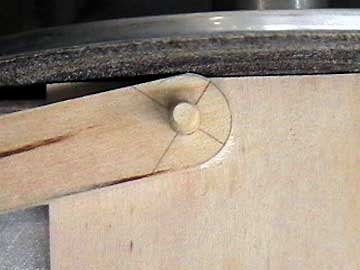
Mark the location for the thumbscrew.
Use a compass or circle template to mark the outline unless you just
want to sand it to shape by eye. The outline is not critical.
Use the correct drill for the tap that
will be used for the thumbscrews. The thumbscrews I use have a 10-24
thread which require a number 25 bit.
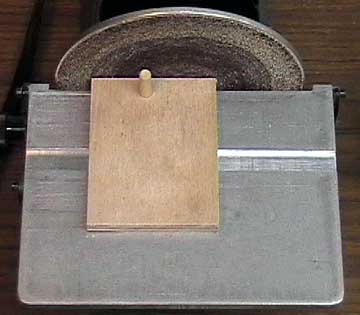
Another simple fixture that speeds things
up. Drill a number 25 hole in a scrap of plywood and glue a dowel
in the hole. Chuck a 3/16" dowel in
your drill and use a sanding block to bring it down to size.
The fixture is temporarily glued to the
table of my disk sander using CA. Because I always wax my tables,
the fixture pops off easily by sliding a single edge razor blade under
it.
Each press is placed over the dowel
and sanded to shape.
Almost complete.
Tap the presses for the thumbscrews.
Use fine sandpaper to knock off the edges and smooth all the faces in
preparation for the finish.
I use
three coats of satin brushing lacquer. The final coat is rubbed out
with fine steel wool.
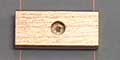
You will want to use some type of clamp
block with these presses so that the thumbscrews do not mar your work. I use scraps
of the same hardwood to make blocks approximately 3/16" x 1/2" x 1".
They have a 1/4" hole counter-bored to half the depth.