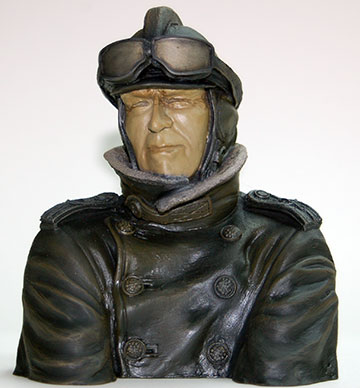
Airfield Models - How To

Paint a Scale Pilot Bust

December 19, 2021


Home
About
What's New
History

Models Gallery
Model Building Safety

Articles
Mail & FAQ

Site Map
Site Feedback

Contact
Add to Favorites

Comments
Search Airfield Models

Back to How-To Articles


Airfield Models (http://www.airfieldmodels.com/)How to Paint a Scale Pilot Bust

Aces of Iron German World War One PilotIn the interest of  irrelevent disclosure, I want to start off by saying I don't enjoy anything about figure painting.  But it's a skill I need to develop so I don't have to avoid having figures with my models and so those figures don't lower the quality of the overall piece.

So this is an article by a guy who is happy with the end result but doesn't enjoy the process of getting there.

Before you start painting you should have already set up the mounting for the bust.  You don't want to handle the pilot any more than necessary after it's painted.

When the bust has the mounting set up clean it thoroughly to prepare it for paint.  The best way to do that is run some warm water into a sink.  Add a good degreaser such as Tri-Sodium Phosphate (TSP).  If your area has outlawed TSP then find something similar.  Do not use dish soap!  Dish soap contains chemicals to make water sheet off dishes and it can cause fisheyes in your paint.

Use an old, soft toothbrush to scrub the pilot clean.  If you read the article about mounting the bust you'll know this one has some thin areas and is weak.  Don't scrub too hard or you may break through those thin areas.  Scrub gently but thoroughly.

If you have an air compressor then use it at low pressure to blow most of the water off and out of the bust.  If you don't have a compressor then gently shake most of the water off and put the bust someplace warm to dry.  If the area is dusty then cover the bust with an upside-down bowl that is propped off the surface about an inch so air can circulate and the pilot can dry.

I strongly suggest that you don't wipe the pilot dry.  You'll probably end up with lint all over the pilot and possibly give him a static charge.  The static can mess up your paint if you use an airbrush.

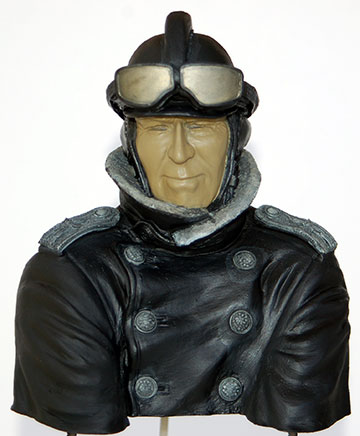
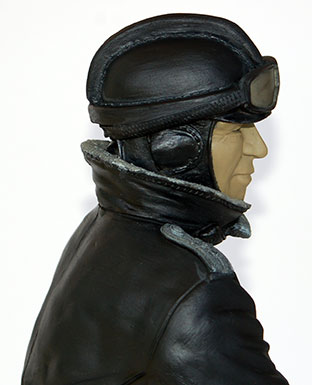
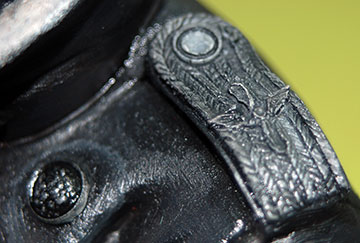
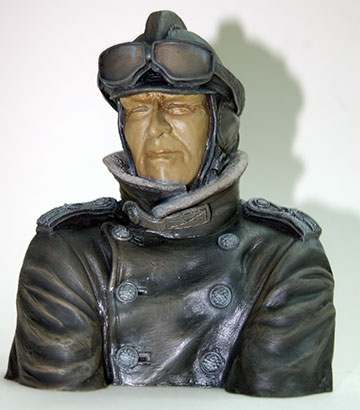
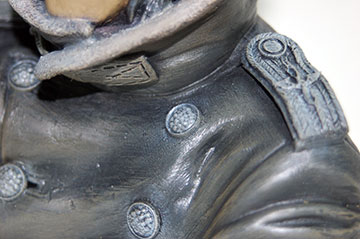
Look over the figure carefully and check for any defects that need to be corrected.  The Aces of Iron pilot in this article has flash between the collar and the neck and down the back of the jacket.  The left eye had a cyst below the upper eyelid that I didn't notice until I was painting the eyes.  I had to remove all the paint from that eye using a brush dipped in thinner and then trim away the resin to correct it.

The only filling this pilot needed was where I chipped it in one area of the base when I was sanding the excess resin away.  I filled that with micro-balloons and epoxy resin when I mounted the pilot.

In this series

Also see


Painting the Bust

Aces of Iron Pilot for SR Batteries 1/4 Scale Eindecker E1 "Hey," you exclaim.  "Is this some kind of dirty trick?  You said you were gonna teach me to paint a bust and it's already painted!"

Ok, calm down.  I'm jumping ahead to the fun parts.  I think you can handle putting down the base colors without my help.  I airbrushed the black and brushed the other colors.  Don't worry if you don't stay in the lines.  Washes and dry-brushing will make those kind of mistakes disappear unless you go way over the line.  If you do that then just touch up with the appropriate color(s) before proceeding.

The face was painted using Testor's Model Master Desert Tan.  I didn't need to paint the face at all but when I painted the last pilot I dry-brushed through the base coat back to the bare resin.  I wanted a little bit of a barrier so it wouldn't be so obvious if I do it again.

The goggles are a mix of various metalizers.  It needs to be toned down some or the goggles will end up looking like Blade sunglasses.

One thing to note is that if you paint small metal objects using metallic paint then they will often look wrong.  I use a light gray for silver-colored objects.  When it comes time for dry-brushing I use lighter grays and white to add highlights.  Then I'll very lightly dry-brush with a silver oil paint to add just a touch of glimmer.

Never use "straight" black to paint anything on a scale model.  Use 80% gray instead. The "black" you see on the figure isn't actually black.  It's 80% gray (4 parts black, 1 part white) mixed using Model Master enamels.  Black is always wrong for a scale model.  I've yet to come across a single instance where pure black was the right choice.

The heavy outline around the photo is what your computer thinks is "black."  If your monitor is calibrated correctly it should be pretty close.  Look at the bottom of the image and contrast the black on the jacket with the black outline.

After the base colors dried a week I sprayed a barrier coat of Klass Kote satin clear epoxy.  Washes are mostly thinner but can be used without the barrier coat if you're very careful.  By very careful I mean apply it and then don't mess with it.  Don't brush it, don't wipe it, just leave it alone.  I strongly suggest the barrier coat.

If you think you'll need to wipe off excess then a barrier coat is a good idea especially if the base paints and the oil paints have the same base chemistry.  In this case they are both oil base.

I didn't want to take any chances of washing off the base colors.

Allow the barrier coat to dry thoroughly.  I waited 48 hours.

Brush a light coat of thinner before applying washes. A light coat of thinner (the same thinner used to make the wash) is brushed over the figure to prepare it for washes.  Thinner helps break the surface tension and allows the washes to flow into nooks and crannies where shadows are needed.

I use washes made from oil paint and turpentine so I brushed on a light coat of turpentine before applying the washes.

A Black wash is applied to all the buttons. The silver buttons are painted light gray.  A straight black wash is applied on and around the buttons.
A Black wash is applied to all accouterments. The same goes for all accouterments.
A black wash is used to darken the inside edge of the goggles and remove some of the shimmer. A black wash was applied to the goggles and brushed over the entire surface of the "glass" to take away some of the metallic shimmer.  More work was done to the goggles at various times.  Any time you see the goggles in later photos, take a look to see how they progressed.
Everything got a black wash.  The uniform received three washes in total to really darken shadow areas. Shadow areas were given three black washes total.  I really wanted to darken creases, areas around the stitching, etc.  It will stand out a lot more after dry-brushing.

Give the washes plenty of time to dry.  I let them set up for a week and they were still kind of sticky in deep crevices.  I probably should have applied more lighter coats.

Raw Sienna oil paint is used to dry-brush highlighted and worn areas and edges. Raw sienna is a good approximation of "leather" color.  I'm leaving the pilot's jacket and helmet black but you can also make it brown.  Use raw sienna for either black or brown leather.

Dry-brush raw sienna lightly over raised areas of the uniform to indicate wear (through the black dye) and very lightly scrub it over the rest of the uniform to give just a hint of the underlying leather color without turning the jacket brown.

If you want a brown uniform then build it up over several subsequent dry-brushings.  It's easy to go too far too fast.  Building up light applications will help you find the "right" stopping point.

Dry-brush raw sienna sparingly for a black uniform or more heavily for a brown uniform. The dry-brush application is applied but needs some more blending.  Some of the brown between the top and second button on the uniform was wiped away with a soft cloth because it's too brown in that area.

Use a brush that's small enough that you can avoid areas you don't want to hit such as the buttons and accouterments.

I've mentioned always brush down when dry-brushing highlights.  I'm mentioning it again in case you forgot.

Ignore the face.  It's hideous now but I'm going to put a new base coat on it when the uniform is done.

Mix a light gray for a final highlight applied to everything but the face. Next up is a light gray dry-brush application.  This will be applied everywhere except the face.  Especially hit all the raised areas and the edges of everything.
Blend the highlights for the most natural look. The uniform is back to black again but the raised areas need to be blended to a more natural look.  Use a clean soft paintbrush and keep at it as if you're dry-brushing (which you are) but without any paint at all.  The highlights will blend in nicely.

Don't wait too long and don't carry the color too far from the raised areas.  A zigzag motion helps keep the paint from spreading too far.

Buttons and accouterments are dry-brushed to a lighter gray. The buttons and accouterments received two or three dry-brush applications to make them gray again.  The previous washes have darkened the recesses and shadows.
Use apprpriate colors to highlight individual items. Using a very small brush I dry-brushed the stitching on the helmet.  There's a little ghosting around the stitching because I'm not that accurate.  I added another light black wash to the stitching to take care of it.

I'm mostly done with the uniform now.  It's all but certain that I'll get paint I don't want on the helmet when I'm working on the face so I'm going to leave final touch-up and blending for later.

The last thing I'm going to do is dry-brush the buttons and accouterments very lightly with white to highlight them.  A little goes a long way so it's important to get as much paint off the brush as possible.

In this series


Previous —
Next —

Scale Model Aircraft Painting Techniques
Make a Magnetic Model Aircraft Building System

Comments about this article


Back to How-To's
Airfield Models Home


Copyright © 2007 Paul K. Johnson