|
|
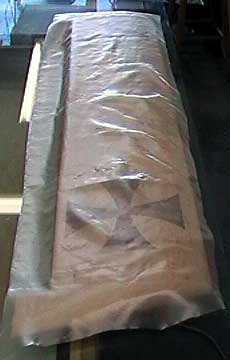
Fiberglassing the wing
As is standard for most finishes, fiberglass is applied in several pieces
from bottom to top. In this example, I use a single piece for the
bottom and another for the top.
Normally, each the top and bottom use two pieces. Each piece goes
from the tip and overlaps the center past the wing saddle on the opposite
side of the wing. This method adds tremendous strength to the center
of the wing.
Each piece must be allowed to cure fully so that it can be feathered
before adding the next piece. Otherwise, the second piece will be
sanded through where the first piece ends which will negate the advantage of
having them overlap.
 |
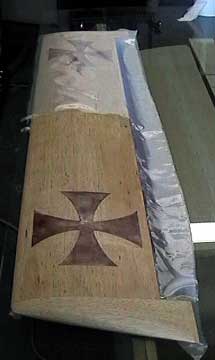
The standard method of glassing a wing is to use two pieces
on each the top and the bottom of the wing. These pieces should
overlap a healthy amount —
at least past the opposite side of the fuselage.
Glass feathers beautifully, so the seam will never be seen. The
overlap adds a lot of strength to the center section.
In this case, the wing is more than strong enough, so to save weight and time I
am using one piece of cloth. |
 |
I am using 1 hour epoxy. It is actually still
workable well after an hour. In fact, this particular brand is
about as thick as normal epoxy glue after about 4 hours. It takes
over 24 hours to fully harden. To make the job easier, I have
applied resin to only one half of the wing. I will spread it out
to cover the entire panel using a squeegee before continuing to the
other half.
Before going on to the other half, I will remove most of the excess
epoxy, but I am not going to spend too much time at it. When the
entire wing is glassed, I will go over the entire wing removing as much
epoxy as possible.
Again, the only job the resin has is to adhere the cloth. Any
resin beyond that is unneeded weight. |
 |
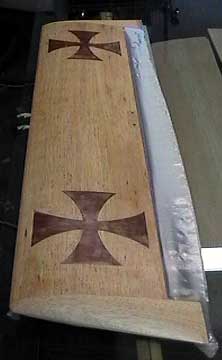
One half of the wing having the cloth full saturated.
More resin can be removed, but I will
apply resin to the other half of the wing before removing
the excess. |
 |
The wing is completely glassed. Now I am going to
spend a fair amount of time scraping up as much glue as possible.
You will notice that the glass does not go over the trailing edge of the
wing. I did this deliberately to ease the application.
What I will do when the top and bottom are both glassed is go back
and glass the trailing edge and the inboard edge of the wing tips using
a strip of cloth. That will complete the wing glassing process and
from there it is a matter of sanding and finishing. |
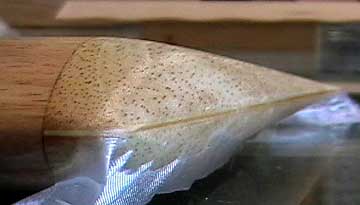 |
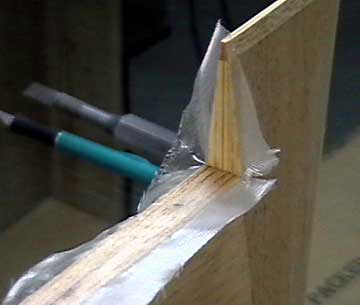
Note how easily glass cloth can negotiate compound
curves. Getting the cloth to lay over this wing tip required
almost no effort. The cloth stuck to the underside of the wing
will remain there. It sands easily when the resin is cured. |
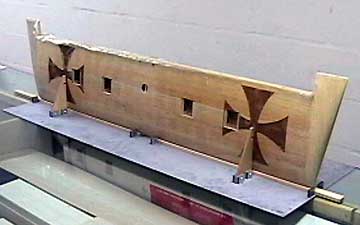 |
The wing is fixed in place so it will not move while
applying glass to the trailing edge. |
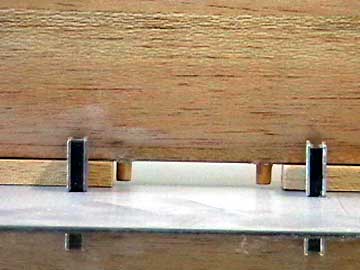 |
I glued the dowels in place even though I shouldn't have.
As I stated in the
Wing
Construction article, they should be left out until the finish is
done because they get in the way. That turned out to be true,
so when the wing was jigged up I used a couple pieces of balsa to
prevent the wing from rocking on the dowels. |
 |
I probably could have cut the glass on the bottom of the
wing to cover the inboard side of the wing tips and the glass on top of
the wing to cover the trailing edge. I chose not to do this
because the wing has a lot of area to cover. There are a lot of
areas to check such as the leading edge and wing tips to ensure the
cloth is down. Eventually there comes a point where it is easy to
miss something, so I minimized this by using a separate piece here. |
Prior to applying any fiberglass to this wing, it weighed 10.1 ounces.
It is approximately 600 square inches. After glassing the entire wing
it weighs 12.0 ounces. A digital postal scale was
used for measurement and I wish I would measured in grams instead of ounces...
too late now. Weights given are after trimming excess cloth but before
sanding.
I mixed 3/4 fluid ounce of epoxy for each side of the wing, but used only
about 1/2 ounce each. Therefore, the total wing used about 1 ounce of
epoxy.
|
|

