Airfield Models - How To

Build an All-Wood Landing Gear for a Model Airplane

December 18, 2021


Home
About
What's New
History
Models Gallery
Model Building Safety
Articles
Mail & FAQ
Site Map
Site Feedback
Contact
Add to Favorites
Comments
Search Airfield Models

Back to Wood Composite Landing Gear


Airfield Models (http://www.airfieldmodels.com/)Preparing the Blanks to Mold a Wood-Composite Landing Gear

I took my original drawing to a local copy shop and made four copies.  I needed only two for patterns but made extra for backups.

One pattern is cut to actual size and the other pattern is cut about 1/8" oversize all around.  The oversize pattern is used to cut the blanks and is traced onto fiberglass cloth using a Sharpie marker.

The actual size pattern is used to draw the outline on the underside of the gear so it can be cut to shape after it is removed from the form.

The mounting hole locations are drilled 1/16" to slide over the pins on the form.  The holes are enlarged for mounting screws when the gear is complete.  Both patterns were drilled at the same time to ensure they aligned correctly.


Make copies of the master pattern to make heavier patterns. A copy of the master pattern.  Two are needed; one for an actual size pattern and one for an oversize pattern.  The copies are attached to heavier material (thin plywood, cardstock, etc.) to ensure they are rigid enough to be traced.


Preparing the Blanks and Fiberglass Cloth

The gear I built several years ago had five 1/64" plywood laminations and one 8 ounce fiberglass lamination between the first and second plywood blanks (from the bottom of the gear.  It was too flexible so I added another layer of 8 ounce glass and one more plywood lamination to the top of the gear.

The gear I am making has six laminations of 1/64" plywood with two laminations of 8 ounce fiberglass and three laminations of 2 ounce cloth.  The heavier cloth are the first and last fiberglass laminations with the lighter cloth in between the middle plywood laminations.

I have no idea how many laminations you need for your plane.  As I mentioned earlier, this gear can handle up to about 5 pounds for sure and possibly more.  The plane that sits on it weighs less than four pounds so it's plenty strong for my application.
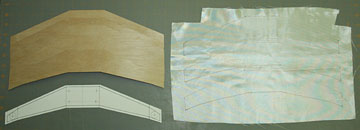
1/64" plywood blanks and fiberglass are laminated to make the landing gear.


I waited as long as possible to cut the fiberglass and handled it very gently to prevent it from fraying.  A round Olfa cutter works great for cutting fiberglass cloth.

Tape the blanks together to drill the under-sized mounting holes. 
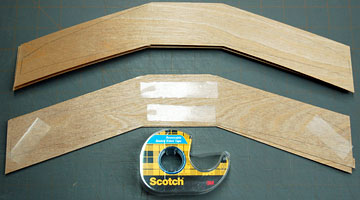
The blanks are joined using removable double-sided tape so the mounting hole locations can be drilled 1/16".
Protect the outsides of the outer blanks using low tack masking tape. 
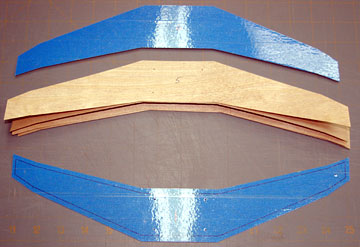
The outside laminations are protected by low tack masking tape and then clear packing tape.

The epoxy used 
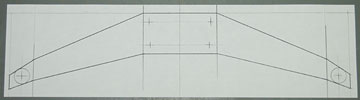
makes Sharpie marker run so I drew the actual size outline of the gear on the masking tape and then added the packing tape over it.  The outline is drawn on the underside of the gear so it can be cut roughly to shape using my scroll saw.


Previous —
Next —

Building a Form to Mold a Wood-Composite Landing Gear
Laying Up The Landing Gear

Comments about this article


Back to How to Build a Wood-Composite Landing Gear
Airfield Models Home


Copyright © 2003-2008 Paul K. Johnson