Airfield Models - How To

Build an All-Wood Landing Gear for a Model Airplane

December 18, 2021


Home
About
What's New
History
Models Gallery
Model Building Safety
Articles
Mail & FAQ
Site Map
Site Feedback
Contact
Add to Favorites
Comments
Search Airfield Models

Back to Wood Composite Landing Gear


Airfield Models (http://www.airfieldmodels.com/)Building a Form to Mold a Wood-Composite Landing Gear

The form the gear is molded over is very important.  It needs to be accurate and stable.  I didn't build my form for any kind of production.  I hoped to build only one gear but keep the form to build a replacement some year if necessary.

I used thirteen metal clamps to mold the gear.  The form held up without distorting in any way I could detect.


Making the Form

Parts to make wood-composite landing gear form. All parts for the basic form.  The backing is 1/4" lite ply.  The form pieces are 1/2" medium density fiberboard (MDF).  All parts are fit and adjusted as necessary to create tight-fitting joints with everything squared properly.

All landing gear bends are 45°.  All form miters are 22-1/2°.  I used my miniature table saw to cut the MDF and my scroll saw to cut the backing.

Gluing up the form. I glued up the form using carpenter's glue.  Make sure it's square in all respects or your gear will be twisted.  MDF absorbs a lot of glue so I double-glued all the joints and used hand pressure to join them.  The glue grabbed in a minute or two.
The completed basic form having radiused corners. The completed form has all landing gear bends sanded to a radius.  I pulled a 1/64" plywood gear blank around the form to ensure it didn't crack at any of the bends.
The completed basic form having radiused corners. Another view of the completed form.

I used my disk sander to add 1° of toe-in to the form.

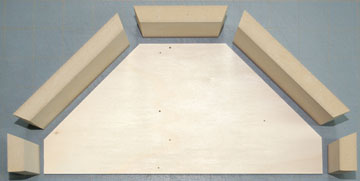
I drilled 1/16" holes in the landing gear blanks where the mounting screws will go.  These holes will be used to align the blanks on the form so matching holes were drilled in the form.

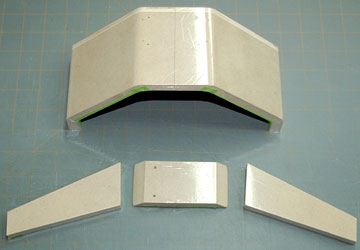
I used the master landing gear pattern to locate the holes in the landing gear 
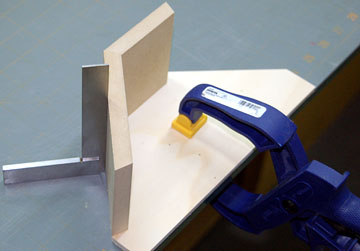
blanks, form and the upper form clamp (next photo bottom center).

The completed form with alignment pins and clamping blocks. 1/16" music wire pins are used to align the blanks during the lay-up.  I used the same pattern to locate the pins as I used to drill the landing gear blanks to ensure there was no chance of things not lining up.

In front of the form are MDF clamping blocks.  Not shown is a pair of blocks for the feet of the gear.  All clamp blocks should be slightly oversize all around.

The holes in the center clamp block are one drill size larger to ensure it slides over the pins easily.

The form and clamp blocks are covered with plastic drop cloth material. 
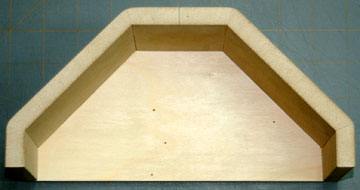
Thin drop cloth material is the mold release.  It is pulled taut around the form and secured with tape.  The clamp blocks received the same treatment.

The form is ready to use.

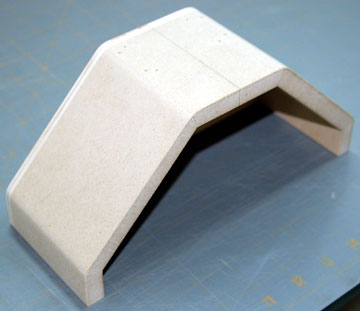
The four 1/16" pins are cut long enough to extend above the center clamp block when the whole works is together.  That allows the option of removing the pins before the epoxy cures.


Previous —
Next —

Designing a Wood-Composite Landing Gear for a Model Aircraft
Preparing the Blanks

Comments about this article


Back to How to Build a Wood-Composite Landing Gear
Airfield Models Home


Copyright © 2003-2008 Paul K. Johnson